Microsoft has released an out of band update to fix the memory leak issues with the lsass process on Domain Controllers after applying the March 2024 cumulative update. Microsoft strongly recommends that the latest servicing stack updates are installed before applying the out of band patch.
This out of band patch is a cumulative update and can be installed in place of the normal March cumulative update that is published on Windows Update / local WSUS server. If you want this patch in WSUS you will have to side load it yourself.
We have confirmed in our testing environment that the lsass memory process was starting to creep up. We removed the March cumulative update and applied the out of band patch in our test environment and so far all seems good.
Microsoft has identified an issue that affects Windows Server domain controllers (DCs), and has expedited a resolution that can be applied to affected devices. Out-of-band (OOB) updates have been released for some versions of Windows today, March 22, 2024, to addresses this issue related to a memory leak in the Local Security Authority Subsystem Service (LSASS). This occurs when on-premises and cloud-based Active Directory domain controllers service Kerberos authentication requests.
This issue is not expected to impact Home users, as it is only observed in some versions of Windows Server. Domain controllers are not commonly used in personal and home devices.
Updates are available on the Microsoft Update Catalog only. These are cumulative updates, so you do not need to apply any previous update before installing them, and they supersede all previous updates for affected versions. If your organization uses the affected server platforms as DCs and you haven’t deployed the March 2024 security updated yet, we recommend you apply this OOB update instead. For more information and instructions on how to install this update on your device, consult the below resources for your version of Windows:
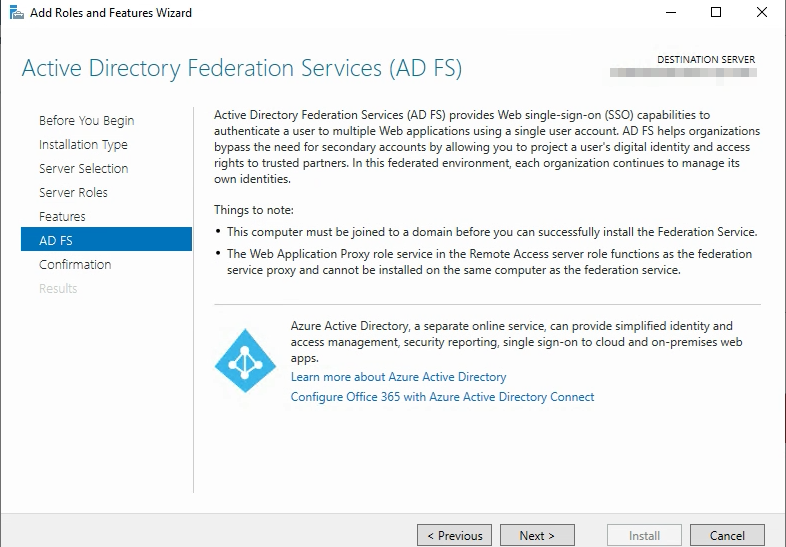
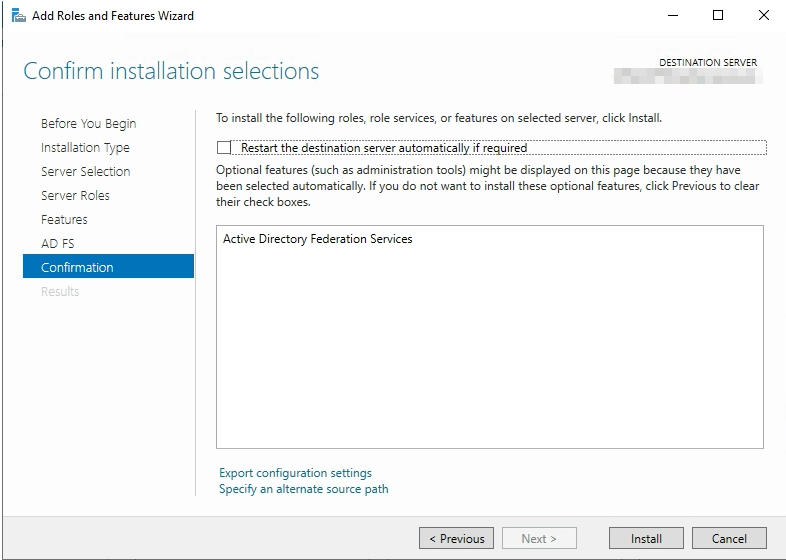
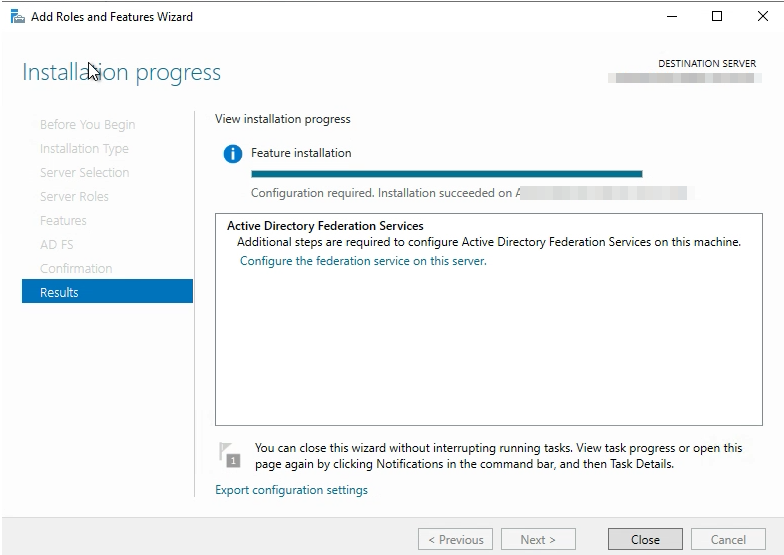
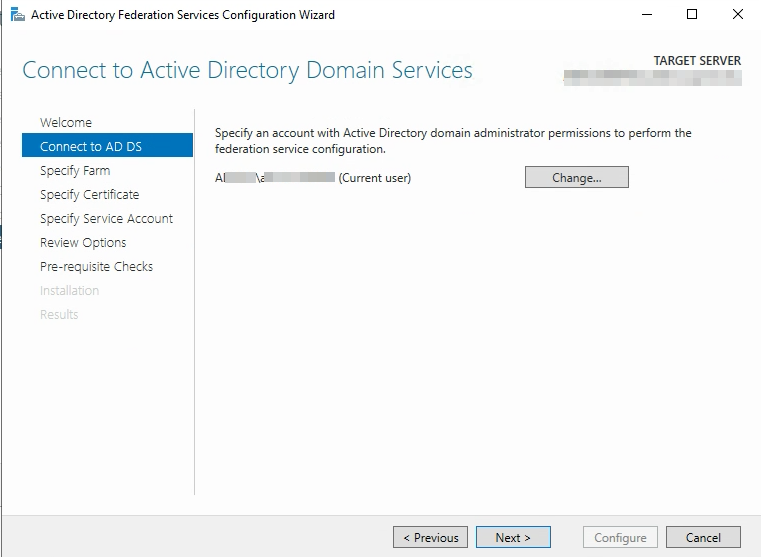
This blog is not going to go through the details get the initial ADFS setup. I’m using ADFS on Server 2019 for this demo though. Bring up a Windows Server 2019 and install the ADFS role. This will require a valid SSL certificate. I did not bring up a web proxy as this ADFS server’s only function is to serve authentication for vCenter so we can put DUO behind ADFS.
Add ADFS Certificate(s) Chain to vCenter:
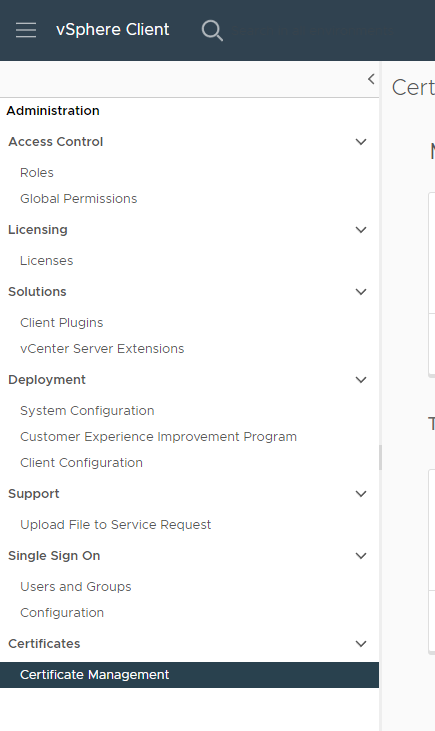
Add the Root & Intermediate CA certificates to vcenter. This can be done under Administration in vCenter at the bottom under Certificates click “Certificate Management”.
Then next to Trusted Root Certificates, click Add and Add Root and/or Intermediate CA certificates here. I added just regular .CRT files that you could open with notepad and show the certificate text.
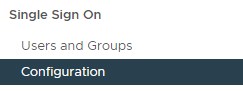
While here in vCenter Administration, navigate to Single Sign On -> Configuration
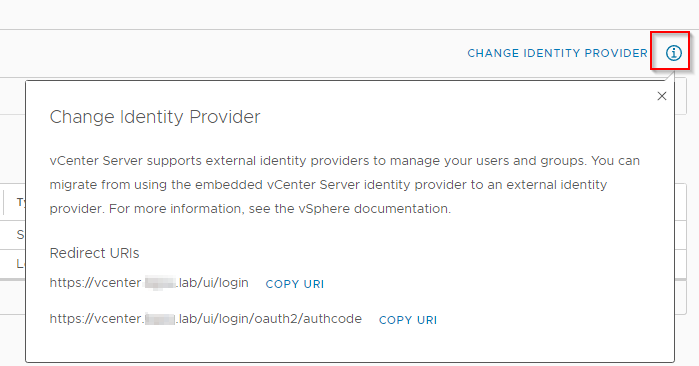
Over on the right hand side click on the “i” next to “Change Identity Provider”
Make note of these Redirect URIs you will need them when you configure ADFS.
Configure ADFS for vCenter:
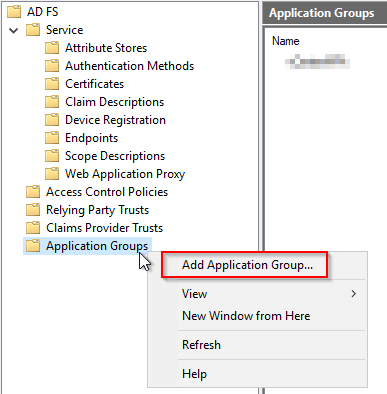
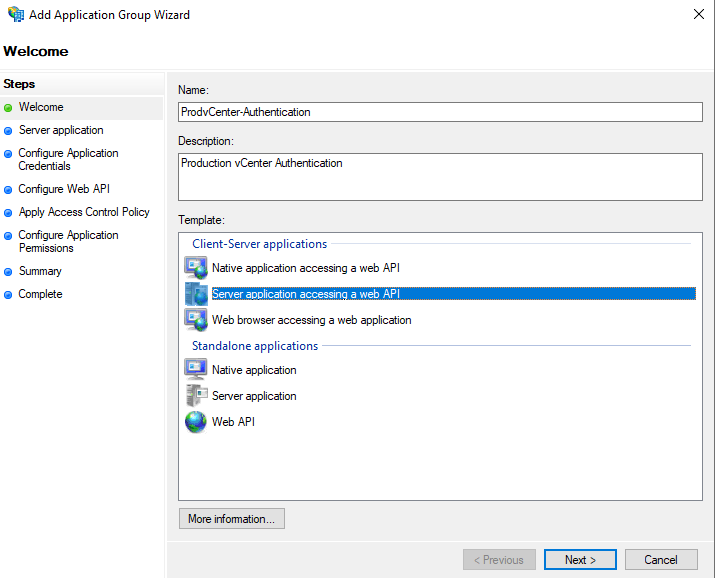
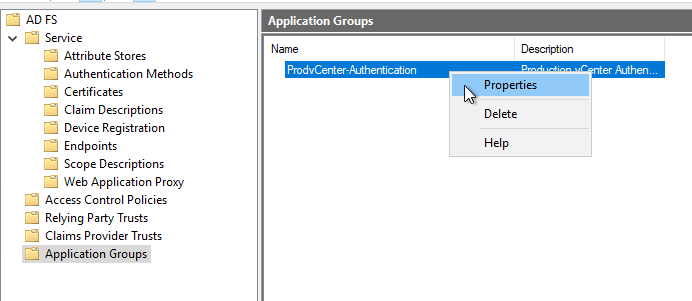
You should now have a brand new install of ADFS with the most basic things configured to make it happy including your SSL certificate. Launch the ADFS Management tool and right click “Application Groups” and click “Add Application Group”.
In the wizard that appears, give your Application a Name and Description that means something to you and select “Server application accessing a web API” and click “Next”.
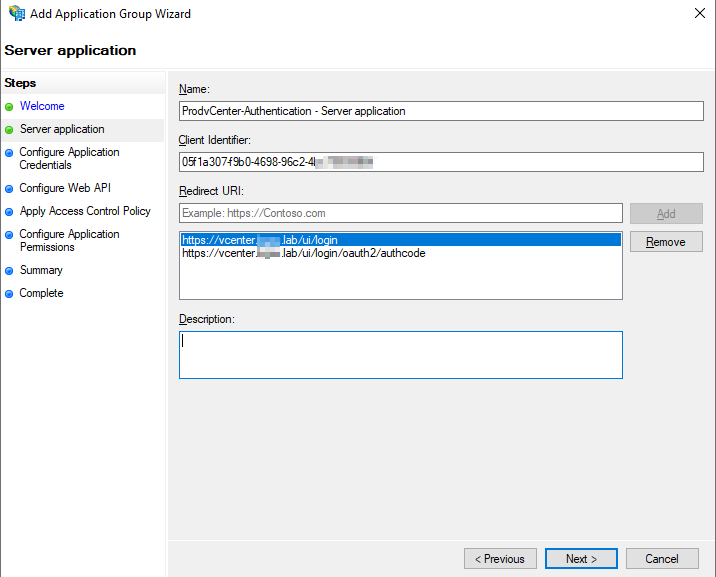
Make note of the Client Identifier. This will be needed later in vCenter configuration. Also input the two redirect URLs you noted earlier in vCenter. Click “Next”.
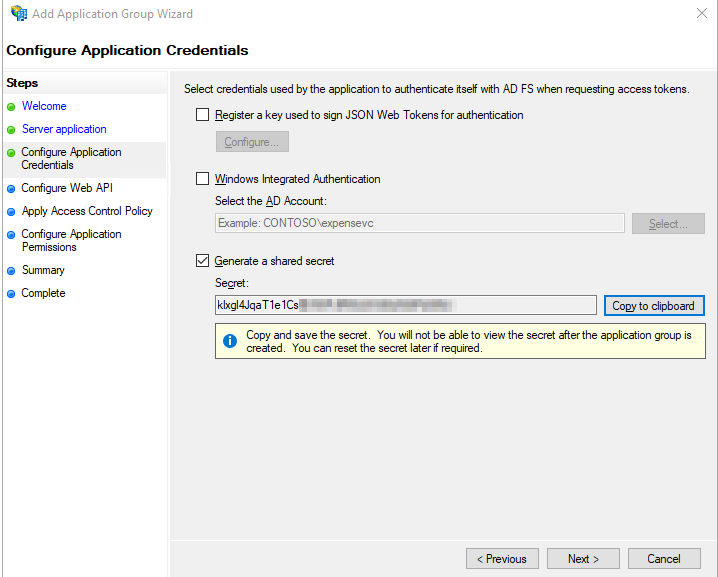
Check the box to Generate a shared secret and copy this down as it will be needed later in vCenter configuration. Click “Next”.
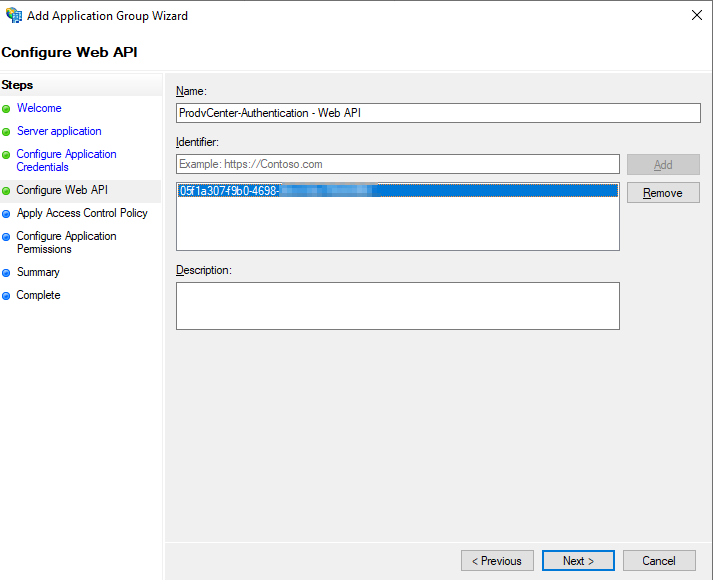
Input the Client Identifier from earlier in this wizard in the Identifier box and click “Add” and then Click “Next”.
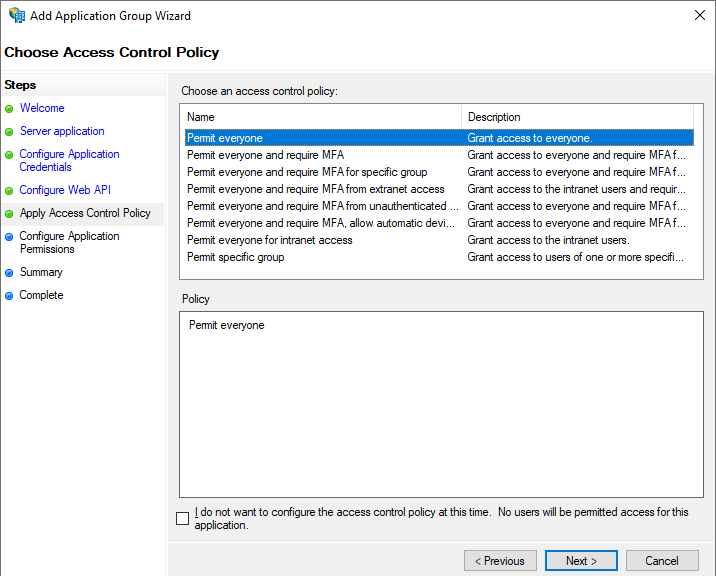
On the next screen for now click “Permit everyone” we can revisit this later after everything is setup. Click “Next”.
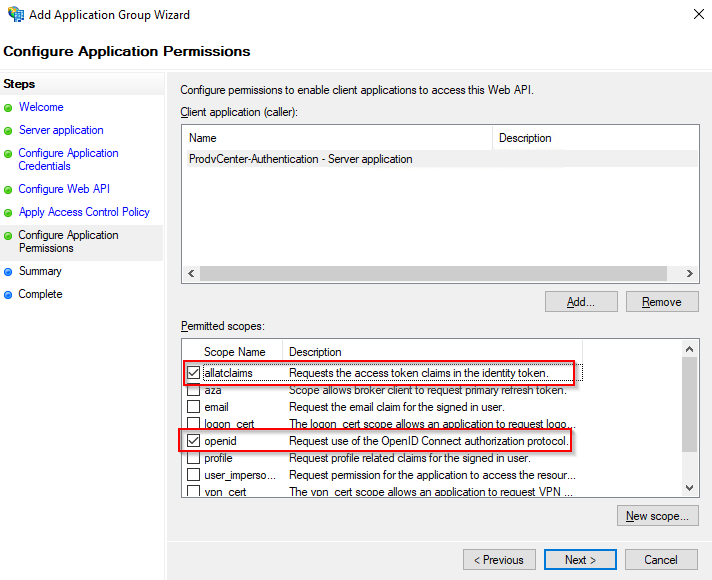
On the next screen make sure “openid” and “allatclaims” are both checked, you will probably have to check “allatclaims”. Click “Next”.
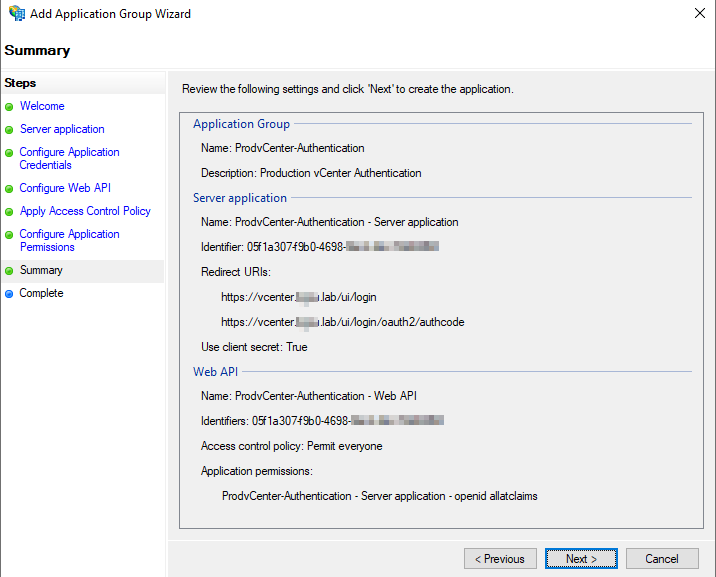
Review and make sure everything looks good. Your Server Application Identifier, and Web API Identifiers should be the same GUID. Click “Next”, and “Close”.
We now need to configure the claims before we can attempt to configure vCenter and attempt a login.
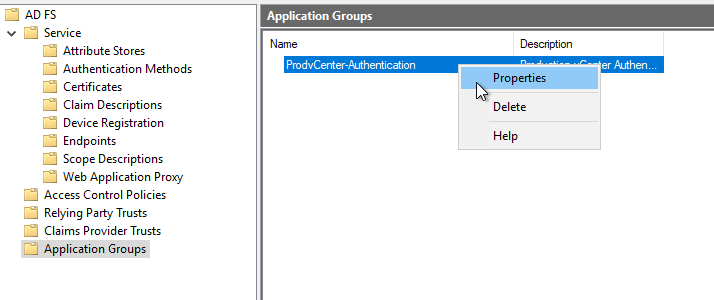
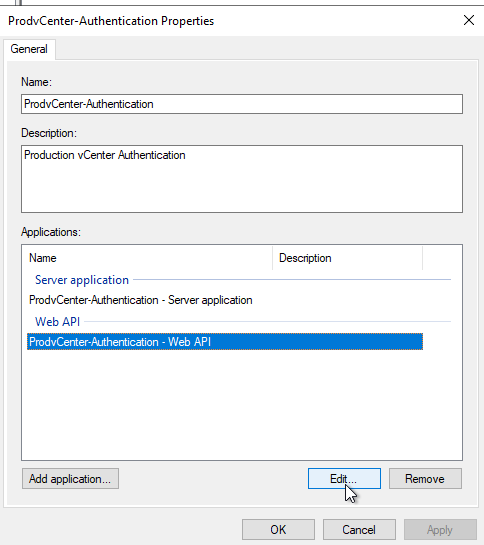
Right-Click the newly created Application Group and select “Properties”
Select the item under Web API and click “Edit”
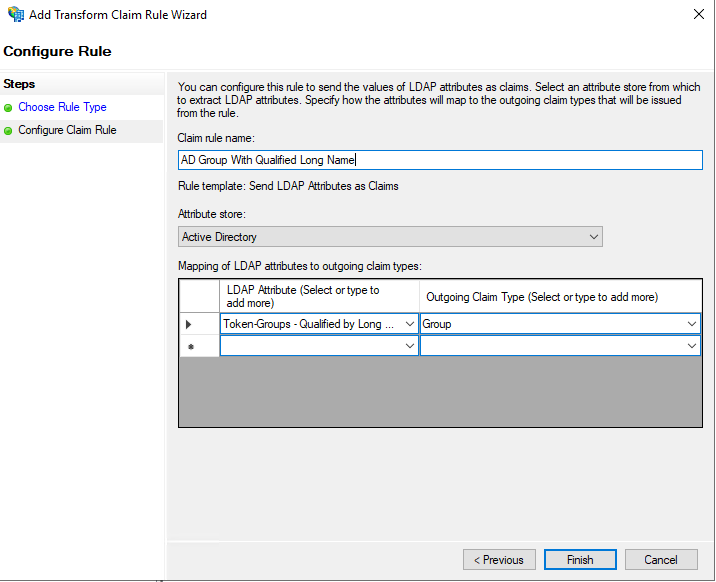
Click on Issuance Transform Rules. Here we will create three rules. Click Add Rule three times and make your rules look like the following: (Note: All Rules will use the default “Send LDAP Attributes as Claims”)
Group Rule:
LDAP Attribute: Token-Groups Qualified by Long Domain Name
Outgoing Claim Type: Group
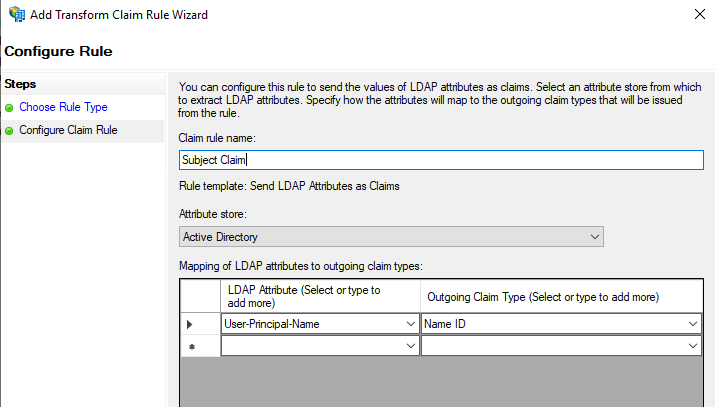
Subject Rule:
LDAP Attribute: User-Principal-Name
Outgoing Claim Type: Name ID
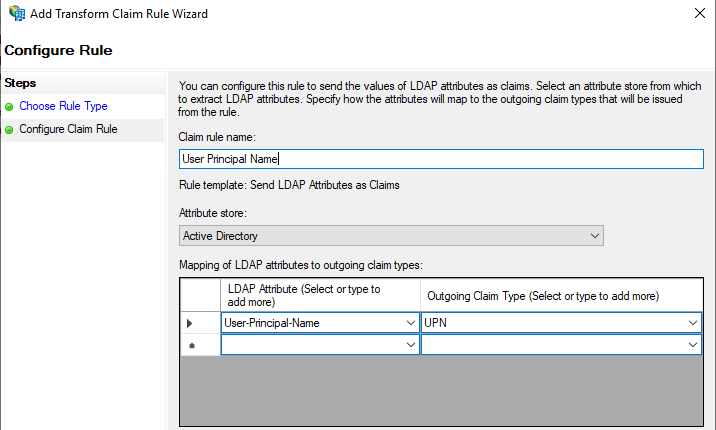
UPN Rule:
LDAP Attribute: User-Principal-Name
Outgoing Claim Type: UPN
Click “OK” to close the dialog box after all three rules have been configured. Click “OK” again to close the Authentication Properties box.
Before we switch over to vCenter configuration we need to snag one more thing from our ADFS server, it is our OpenID Address. To obtain this launch a PowerShell window as Administrator on your ADFS server and type in the following:
You should receive something like the following (save this URL you will need it for vCenter configuration):
vCenter ADFS Configuration:
We are now ready to setup the Identity Provider in vCenter. Navigate back to Administration -> Single Sign On -> Configuration.
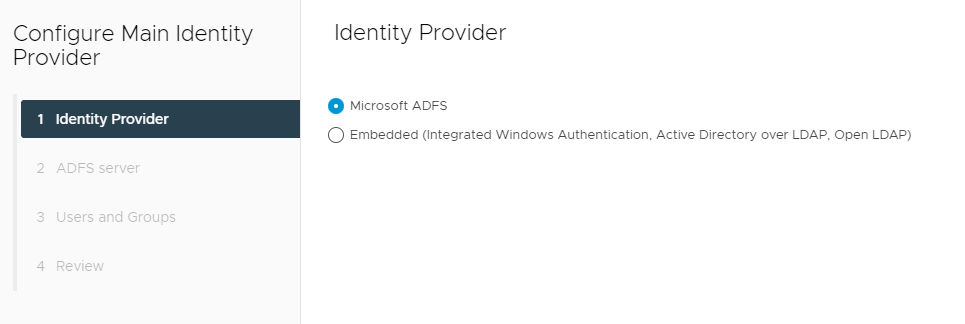
This time click the “Change Identity Provider” link instead of the “i” next to it.
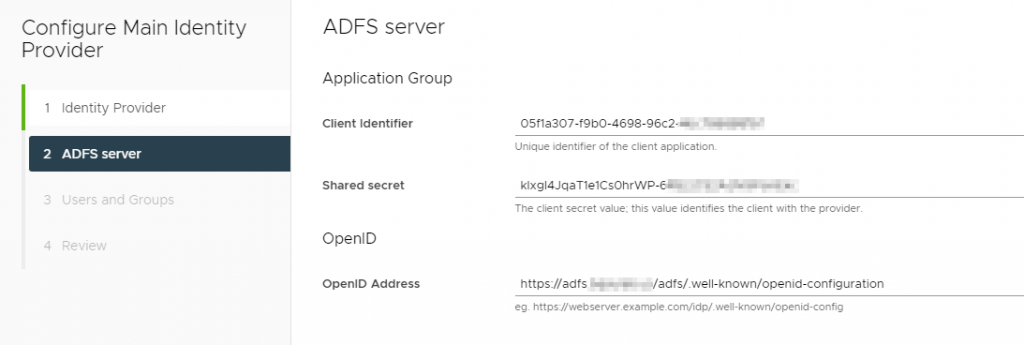
Click “Microsoft ADFS” and click “Next”.
On the next screen, you want to copy the Client Identifier and Shared Secret from ADFS that you set aside during setup. The OpenID address also that we just snagged from ADFS.
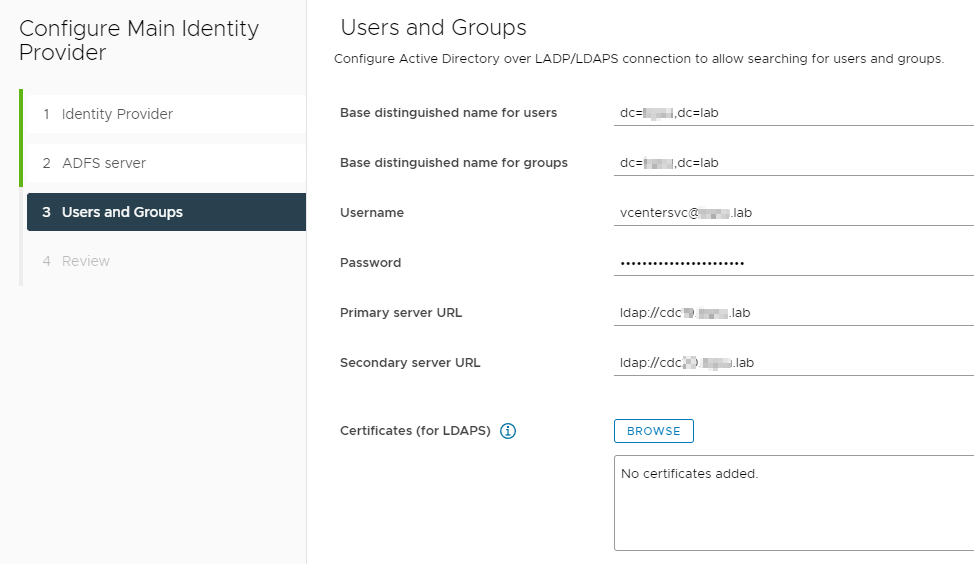
On the next page fill out the base DN for Users and Groups, I’m using the root because this is just a lab setup. I’m using a service account (only requires read access to AD), and I’m only using ldap:// again because this is a home lab. If you are setting this up in Production make sure you are using ldaps://.
Click “Next”, review and click “Finish”.
You should now be able to add an Admin group in vCenter from your Active Directory source. At this point you should be able to logout and log back in to test out authentication to ADFS.
———–YOU SHOULD NOW HAVE vCENTER & ADFS SETUP————
Proceed forward for the DUO configuration and setup.
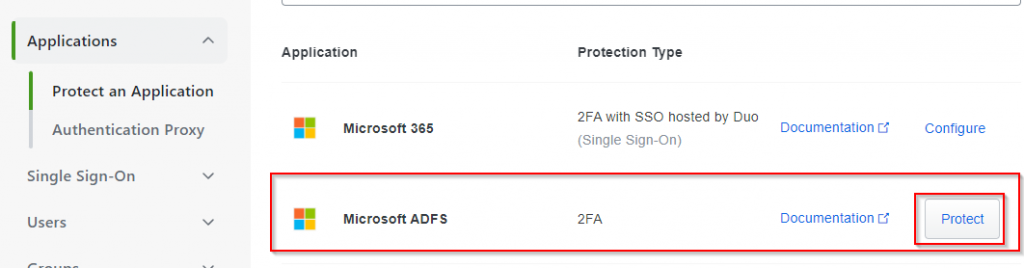
Login to your DUO Administration Portal and Click “Applications” and then “Protect and Application” and then locate the entry for “Microsoft ADFS” and click “Protect”
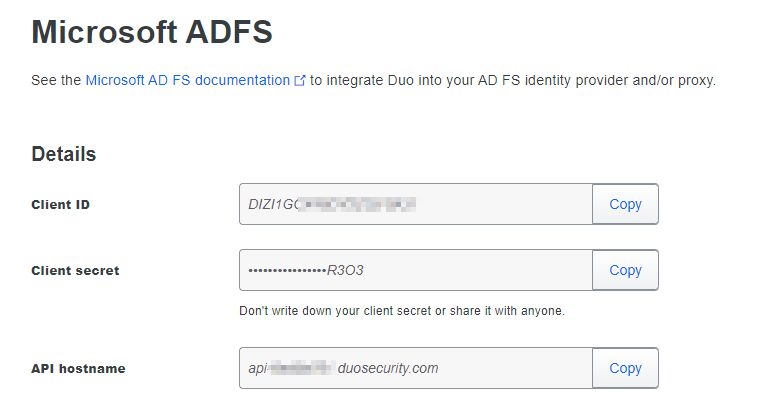
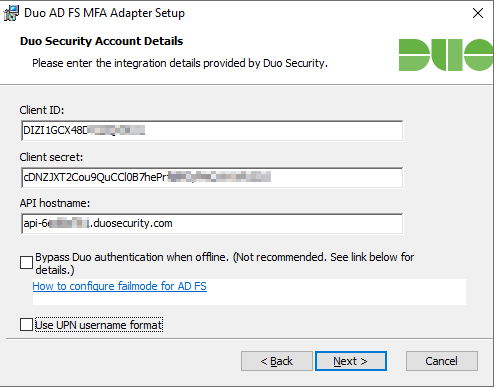
Take note of your “Client ID”, “Client Secret” and “API Hostname”. You will need this information to complete setup on your ADFS server.
If you have an AD FS farm install Duo on the Primary Server first, if you have a SQL farm you may begin with any node. Since this is just a lab I only have the one server.
Launch the Installer. Click “Next”
Enter the Information from the DUO Admin page, or what your Information Security Team will need to provide to you.
Bypass Duo authentication when offline (unchecked) will make sure it “fails closed” and nobody will be able to access resources if Duo is down. This can be changed later in the registry.
By default DUO sends the sAMAccountName, if you want UPN sent, check the box that says “Use UPN username format”.
Click “Next” and Click “Install”
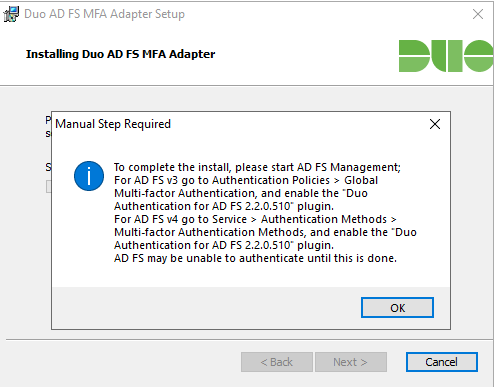
You may then be prompted by DUO to enable the DUO MFA Authentication.
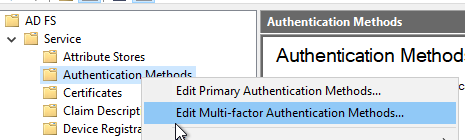
To do this in ADFS Management Open up Service -> Right-Click “Authentication Methods” and click “Edit Multi-factor Authentication Methods”.
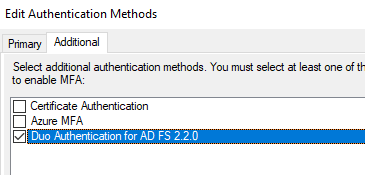
Check the box for Duo and click “OK”
At this point you should still be able to login to ADFS and MFA will NOT be working.
Configure ADFS for MFA:
Go back to your Application Groups, and Right-Click your Application Group and click “Properties”
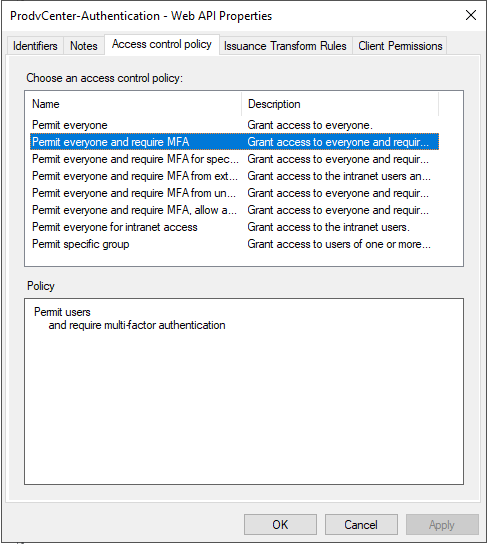
Click Web API and click “Edit”
Go to Access Control Policy and click “Permit Everyone and require MFA”
This blog is a work in progress but I will be keeping track of things to check when taking over an Active Directory Domain. This is not an all inclusive list but a list of common things to check.
ms-DS-MachineAccountQuota
By default in Active Directory this value is set to “10” which allows ANY user in Active Directory to bind ten machines to the domain. In the beginning stages of Active Directory maybe there was a need for this but now its just a big security risk.
Recommendation: Set this to zero
Protected Users Group
Look at highly privileged accounts and add them to the Protected Users Group if they are compatible with the protections that this group provides.
Recommendation: Add any real user accounts that are at Domain Admin or higher. (Enterprise Admins, Schema Admins, etc.)
krbtgt Account Password
Check the last time this password was changed and if it wasn’t changed in the last 180 days, change it.
Recommendation: Make sure you setup a schedule to recycle this password twice a year. This account holds two passwords so when you change the password you should change it twice, ideally 24 hours apart. That is a total of four password changes a year.
Verify SSL Certificates Exist on the Domain Controllers
Verify that valid certificates are in place for LDAPS calls over port 636. As part of this process investigate and try to remove any traffic that is talking on LDAP port 389.
Recommendation: Use either an internal PKI or public facing certificates to make sure all ldaps traffic is talking Active Directory over a secure connection.
Check if Exchange ExtensionAttributes were installed
If “ExtensionAttribute1” -> “ExtensionAttribute15” are in the schema of User/Computer/Group objects, check to see if any of them are in use.
Recommendation: If they are try to document what they are being used for and which ones are free and able to be used.
Check the Default Computer/User Bind OU
The default container for computer objects is (CN=Computers,DC=DOMAIN,DC=COM). This container cannot have group policy applied to it and objects should be set to write to another OU that can be better managed.
“In a default installation of an Active Directory domain, user, computer, and group accounts are put in CN=objectclass containers instead of a more desirable OU class container. Similarly, the accounts that were created by using earlier-version APIs are put in the CN=Users and CN=computers containers.”
“Some applications require specific security principals to be located in default containers like CN=Users or CN=Computers. Verify that your applications have such dependencies before you move them out of the CN=users and CN=computes containers.”
Recommendation: If these items can be re-directed, redirect them to a different OU and make sure proper OU security is set.
Check Tombstone Lifetime / AD Recycle Bin
If the Active Directory Recycle Bin is not enabled, enable it!
The following PowerShell code can be used to see what the current Tombstone Lifetime is:
Write-Output “Active Directory’s Tombstone Lifetime is set to $TombstoneLifetime days `r “
Note that no value returned means the tombstone lifetime setting is set to 60 days (default for AD forests installed with Windows 2003 or older).
Recommendation: If it is not set to 180 days, set it to 180 days. If the AD recycle bin is not enabled, enable it!
Check to see if Sysmon is installed on the Domain Controllers
Recommendation: If Sysmon is not installed, work on getting it installed and configured on the Domain Controllers at a bare minimum
Check Domain Controller Firewall Settings
This may require a conversation with your Information Security team to understand how the Firewalls are configured that sit in front of the Domain Controllers. You want to make sure the bare minimum number of ports are enabled for client traffic and that admin ports are only able to be accessed by admins.
Recommendation: Review security with Information Security Team, and enable the Windows Firewall on all Domain Controllers and manage it with Group Policy. This also acts as an East/West traffic block so if someone gets into one server on the prod network they don’t automatically have RDP access per say to another DC on the same network segment. Setup monitoring for any RDP sessions, successful ones, and failures (including firewall logs). This will verify anyone RDP’ing to the DCs is legit, and will also help track down threat actors on the network. One of the first things threat actors will try to do is see if they have RDP access to the Domain Controllers, this is good information to send to the SOC or InfoSec.
Check to see if RPC Ports are restricted
Recommendation: If RPC Ports have not been limited on the Domain Controllers, limit them to a few ports, say 100, or 1,000, and then make the associated changes to firewall rules.
Check Time Settings on the Domain Controller running PDC Emulator
Many people know that the clients that talk to the Domain Controllers have to have the correct time, but it is super important that you are pulling a correct time source for your Domain Controllers.
Recommendation: Make sure the Domain Controllers, more specifically the Domain Controller with the PDC FSMO role is pulling its time from a trusted source. It might also be worth writing a script to monitor this as well.
Verify FSMO Role Holder(s), Global Catalog Servers, & Backups
Verify who is running the FSMO roles for your Domain(s). Make all DCs a Global Catalog if you have a single-domain forest. Verify how AD is being backed up.
Recommendation: Depending on your specific situation you may not be able to run all FSMO roles on one DC. In my jobs I have been able to. This allows you to target this DC as the DC to be backed up, snapshotted, etc. If you are running a single-domain forest, make sure all DCs are a global catalog.
Check Trusts
Check to see if there are any trusts configured for the domain.
Recommendation: If there are any trusts, figure out if they are still needed, and make sure there is documentation on why these trusts are setup and when they can be unconfigured.
Check Sites & Services for IP Configuration
Check AD Sites & Services for configuration of IP ranges. Make yourself familiar with how this setup and why it is setup the way it is.
Recommendation: Take notes on if Sites & Services is being used. If it is being used understand the network ranges and why it is configured the way it is. If priority is being given, understand why.
If you want to iterate through data, I’m using $Var3 in this template for that purpose. You can see under Global Variables & Input Files I’m creating an empty array for $Var3 ($Var3 = @())
To see this script work, you would just need to have data to iterate through and add it to a PSObject as you can see in my commented out line under “Start Script Programming”
If you are taking over an Active Directory or just trying to run cleanup on one that you currently manage, one of the tasks you will probably want to perform is to check to see which of the built-in schema ExtensionAttributes are in use.
If you don’t have ExtensionAttributes 1-15 in your On Premises Active Directory you will need to extend your schema for Exchange Server.
The script below has also been added to my github.
We ran into an issue with Macs connecting to our file services while attempting an upgrade on a Microsoft Clustering Services File Services on Server 2012R2.
Current Environment:
Two 2012R2 Servers/Two 2016 Servers, with the following Roles/Features Installed:
ROLES – File and Storage Services:
File Server
DFS Namespaces
DFS Replication
File Server Resource Manager
FEATURES
Failover Clustering
Testing:
Two Virtual Machines running 2012R2, with Microsoft Clustering Services, with multiple File Server Roles. Everything works with the Macs connecting to these Clustered File Services while running 2012R2. The cluster level is also 2012R2.
However, after adding a 2016 Server into this Microsoft Cluster, and failing over one of the file server roles to it, the Macs can no longer connect to that file server. They receive a message stating:
There was a problem connecting to the server “”. Check the server name or IP address, and then try again. If you continue to have problems, contact your system administrator.
If you migrate the file server role back to a server running 2012R2 the Mac can once again connect.
Resolution:
I plan to come back to this blog to post a more detailed writeup. I was passed on a lot of information that I haven’t seen but I will try to best to explain what I believe is happening.
When a 2016 Server is added to a 2012R2 only cluster, the cluster moves into “Mixed Mode” to allow both Operating Systems to function. Now Microsoft states you should not stay in this mode very long, from what I’ve seen thrown around no more than 4 weeks.
This is hearsay from packet captures but when a Mac tries to connect to the File Services running on 2016 Server while in mixed mode it supposedly connects on SMB 3.1.1, but then something in the network stack wants to downgrade the connection to SMB 2.0, and the Macs cannot follow it and therefore cannot connect to the server.
However, after removing the 2012R2 servers, and then upgrading the Cluster Level to 2016, the Macs can then connect again.
I’m still doing some troubleshooting and this post will be updated.
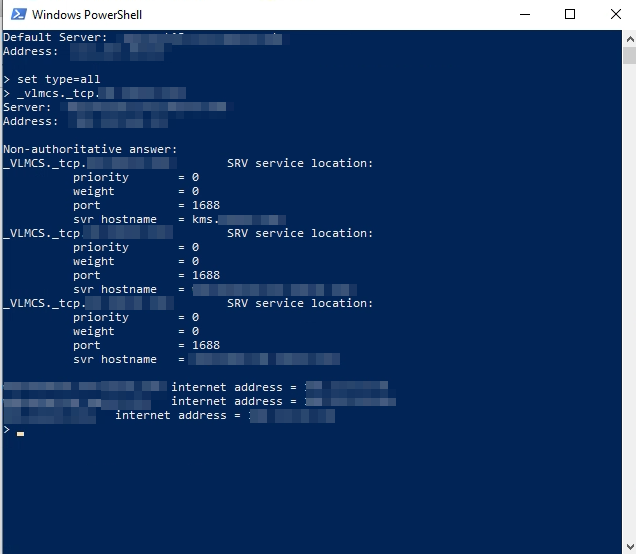
The SRV records for KMS in DNS can be found by launching a command prompt and entering “nslookup”.
Then run: “set type=all” so all records are returned.
Then the record you want to look up is: “_vlmcs._tcp.domain.suffix”
This should return all of the SRV records for KMS services. This is an important area in DNS to watch because if boxes can add themselves to DNS, anyone who installs the Volume License Services could get a record entered here.
In this particular example we have three SRV records.
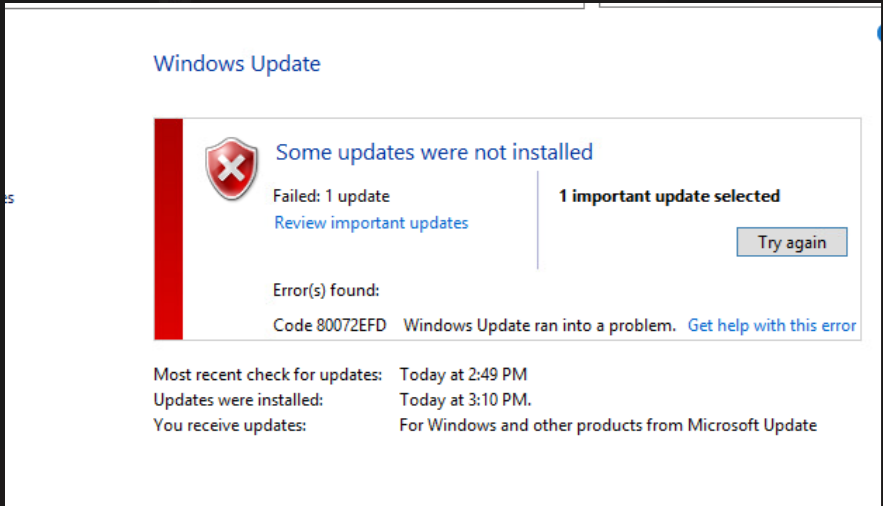
We ran into an issue updating our Domain Controllers from Windows Update. This appears to be profile based at first troubleshooting. A different Domain Administrator could pull down updates without any issue.
Still investigating… but if google directs you here, try another DA account.
This blog is only providing the information needed to replace the WAP/ADFS servers with new servers running 2019. This article is not providing any information on upgrading the farm behavior level.
Always do this in a test environment before affecting Production
WAP Server Replacement: Use whatever mechanisms you have through your load-balancing infrastructure to drain one of the WAP servers so nobody is accessing it.
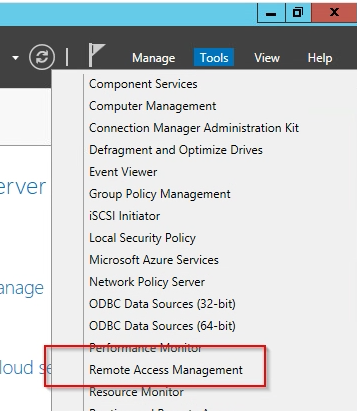
In Server Manager launch “Remote Access Management”
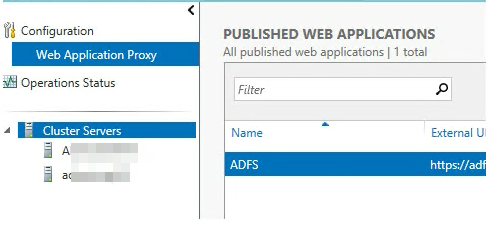
Verify you see the number of Clustered WAPs servers you should here.
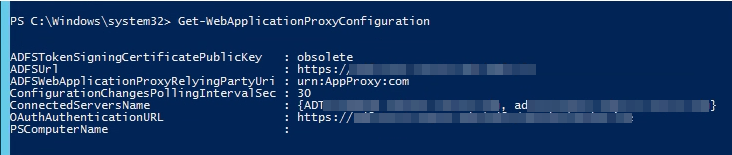
You can also verify this with PowerShell by running the following command in an Administrative Powershell: Get-WebApplicationProxyConfiguration.
Look at the “ConnectedServersName” field, here I have two.
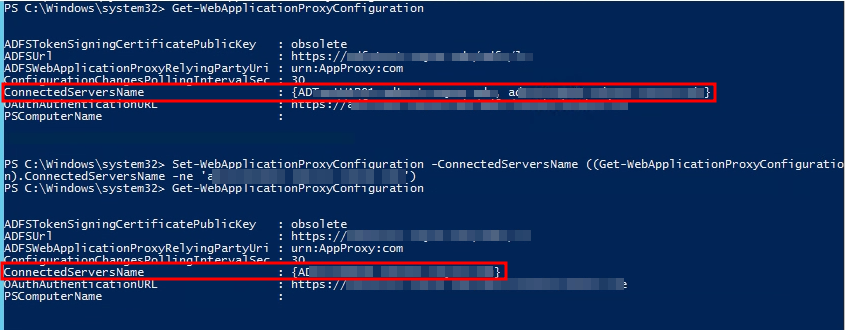
Remove the box that you are currently logged into from the ConnectedServersName property object by running the following PowerShell: Set-WebApplicationProxyConfiguration -ConnectedServersName ((Get-WebApplicationProxyConfiguration).ConnectedServersName -ne ‘servername.domain.suffix’)
[-ne means not equal, you want to put the server you want to remove in place of ‘servername.domain.suffix’]
You can then verify by running Get-WebApplicationProxyConfiguration again and see that the server has disappeared.
I only have two WAPs so at this point both nodes are still servicing requests but only one node is left in the settings. You can now shutdown the node you removed and bring up a new 2019 server with the same name/IP and bind into the already existing AD Object.
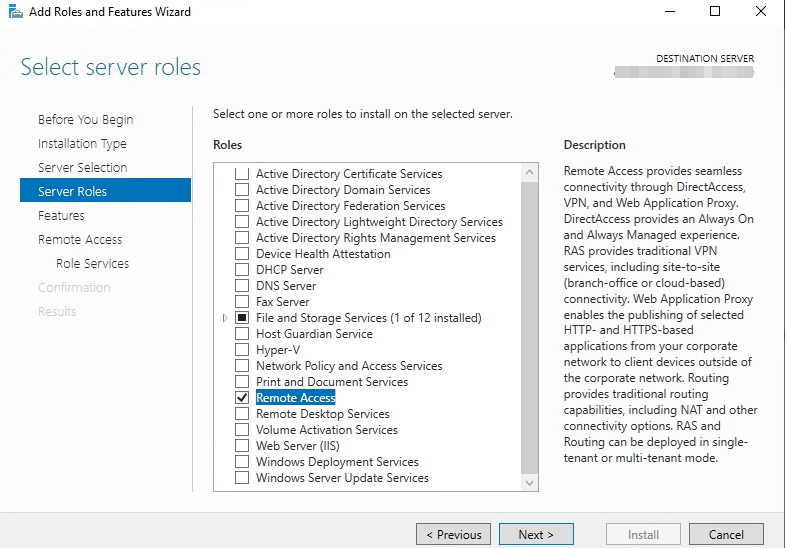
Once this box is up login with a Domain Admin account and Add Roles/Features and add the “Remote Access” Server Role
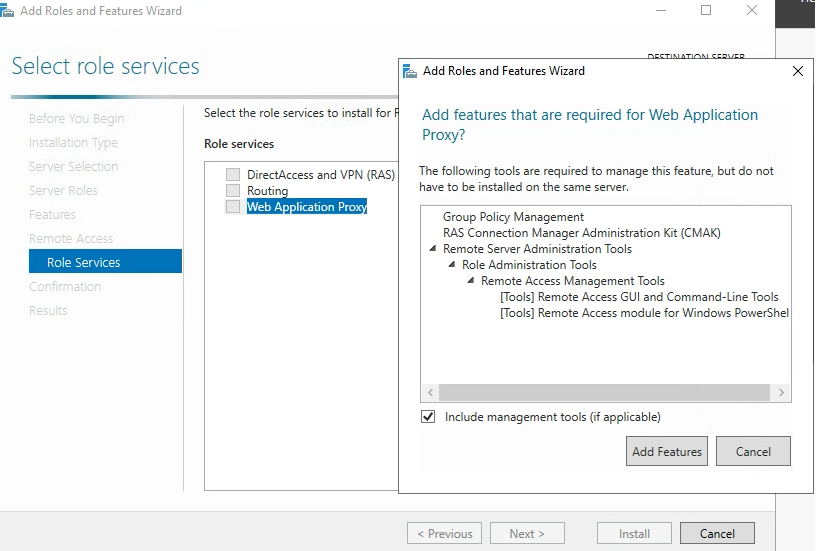
Choose “Web Application Proxy” on the Role Services tab. You may be prompted to accept installing additional features, go ahead and click Add Features.
Once this is complete and before you launch the Web Application Proxy Wizard, we need to get the ADFS certificate loaded onto this box.
Go to another ADFS node that has the certificate and export the certificate. This certificate should be in the Personal\Certificates area of the Local Machine.
Export the certificate
Import the Certificate on the server you are currently working on into the Personal\Certificates Certificate Store of the Local Machine.
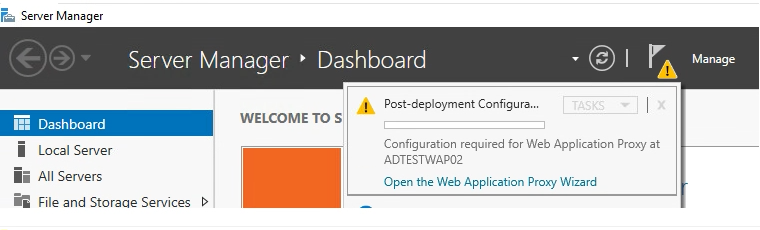
Now you are ready to Open the Web Application Proxy Wizard”
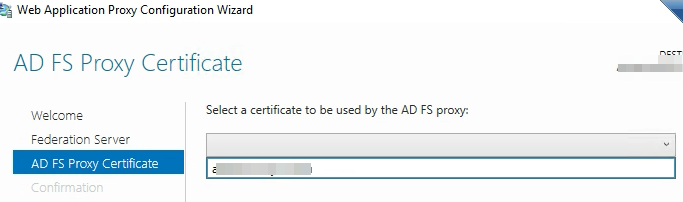
Choose the Certificate we imported it should be in the drop down.
Before you hit “Configure” depending on how your DNS is configured you need to make sure the WAP server can get to your adfs servers using the primary DNS name. For us this involved some HOSTS file magic.
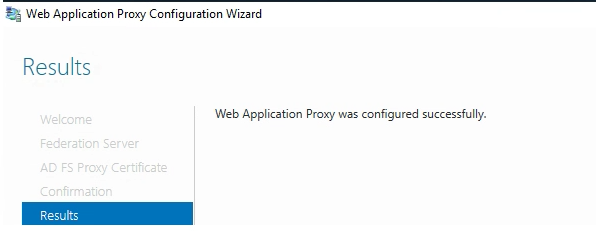
Click “Configure” and you should see the Web Application Proxy Configuration completed successfully.
VERIFY everything is up and working and this new node is servicing requests. You should also see now that Remote Access Manager and the Powershell configuration once again shows two nodes participating.
Repeat this process to take down any other WAPs.
ADFS Server Replacement:
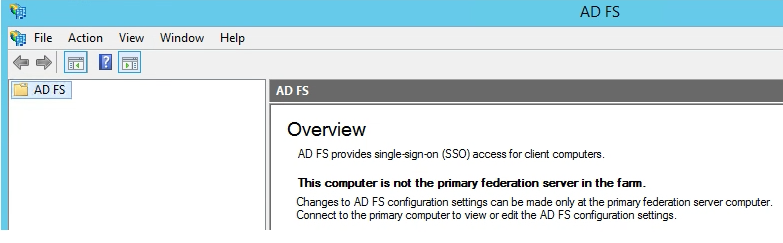
Login to any of the federation servers that are not currently the Primary Node. You will know this by launching the ADFS Management Console.
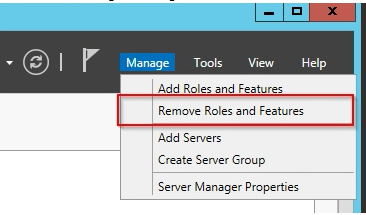
Go to Server Manager, Manage -> Remove Roles & Features
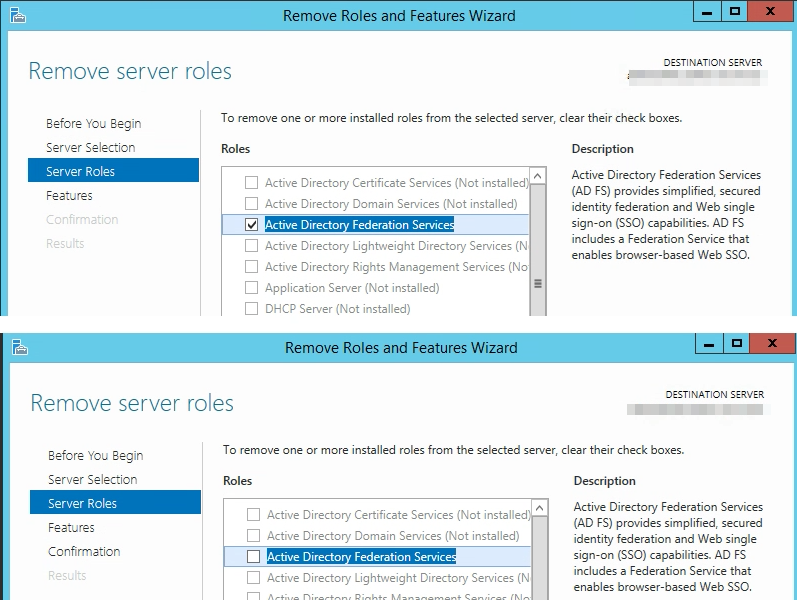
Uncheck Active Directory Federation Services.
Click Next, Next, Next…… Finish
Reboot to finish the removal process.
Shutdown this box and bring up another box with the same name, IP, configuration. Bind it to the domain and take over the old AD object.
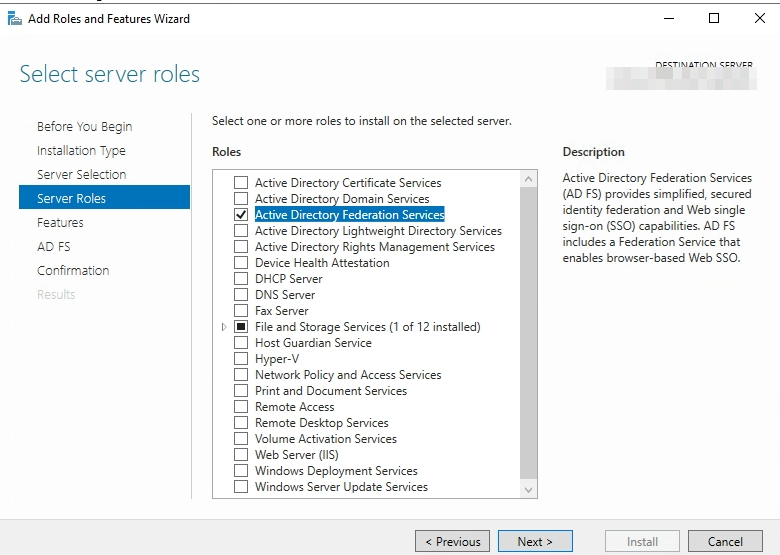
Login as a “Domain Admin” and Go to Server Manager, Add Roles & Features
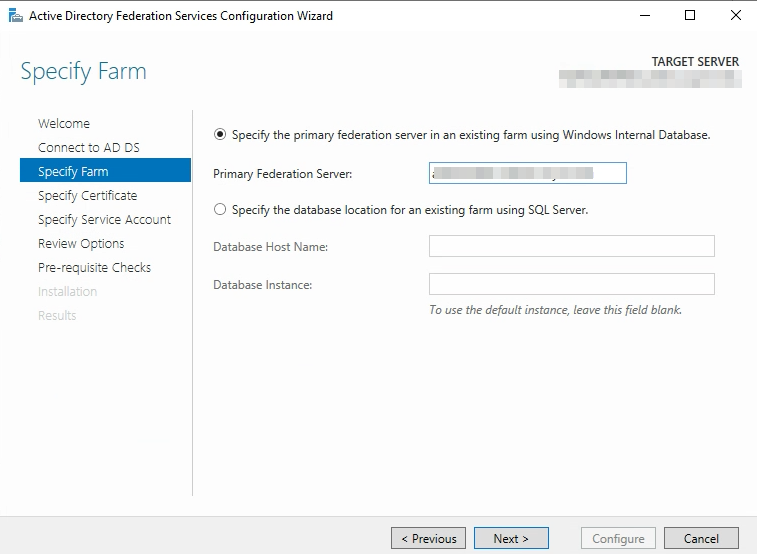
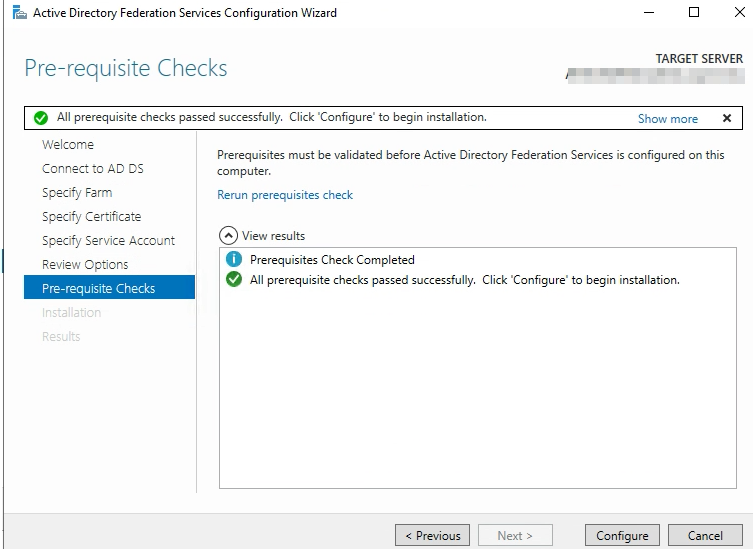
Click “Install” and then configure the federation services on this server.
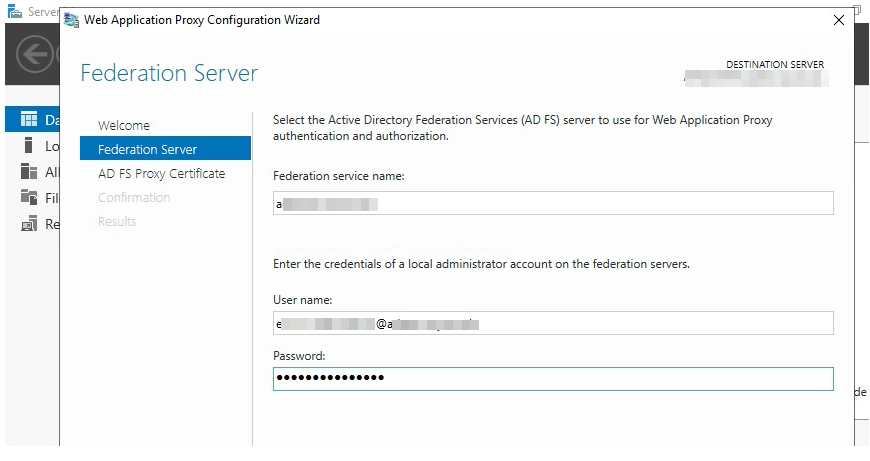
Specify the FQDN of the Primary Node of your Active Directory Federated Services. (Servername.Domain.Suffix)
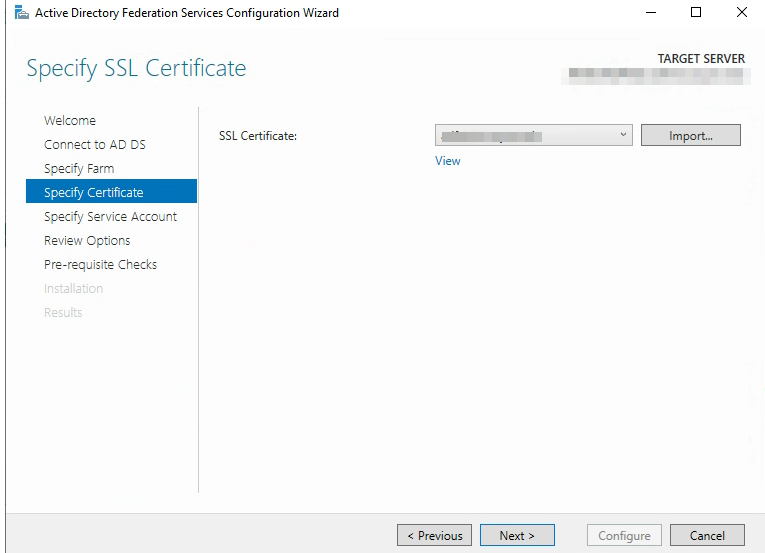
Note** Like we did on the WAP servers make sure the certificate is loaded onto the Local Machine Personal Certificates Store on this box before continuing.
Choose the SSL Certificate you imported
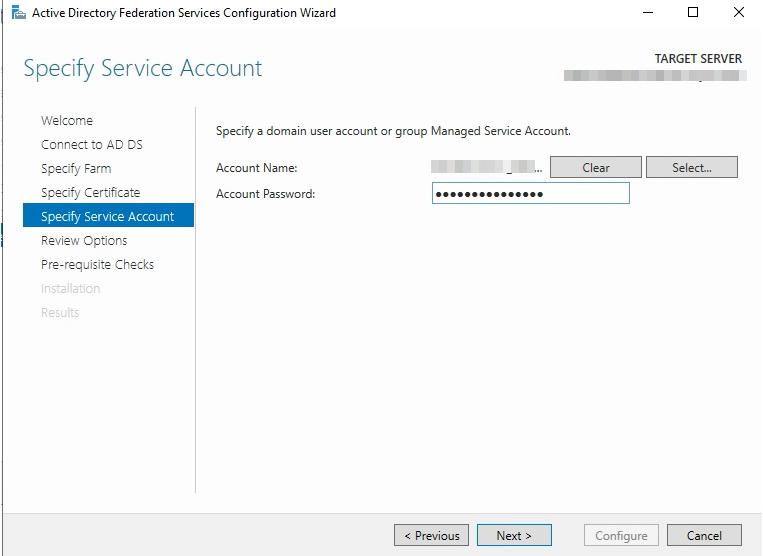
Specify a domain user account or group managed service account. In this particular example this is a domain user account. If you use a domain user account make sure it is a local administrator of the server.
[I’m checking on this local administrator may not be needed anymore].
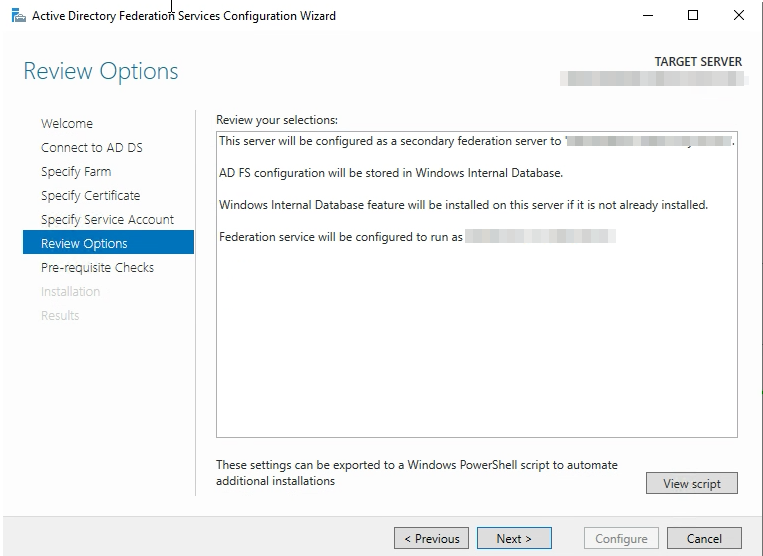
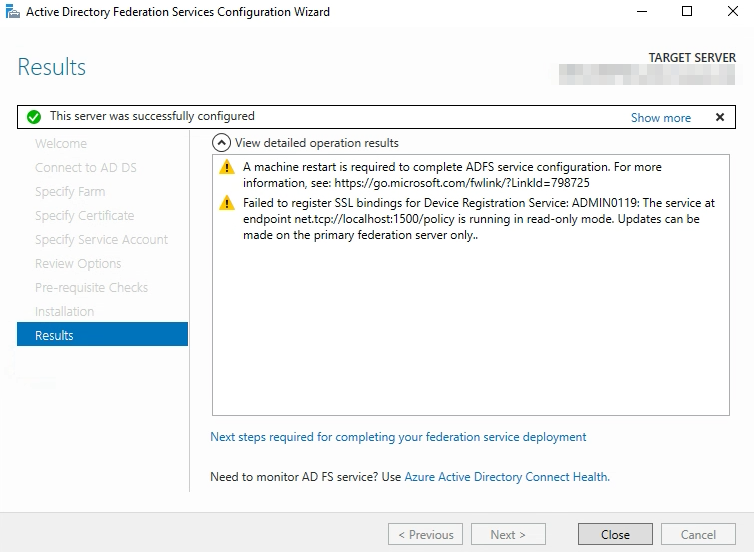
NOTE** If you are locking down firewall rules, before configuration can run verify that Port 80 can be accessed on the primary node from this server.If you receive DNS errors here it could be Port 80, and not actually DNS.
Reboot.
Verify this node is now accepting requests.
Perform these steps on every other ADFS node that is not the primary node. Once complete, continue to migrate Primary Node to a node that was already replaced so primary node can be upgraded.
Migrate Primary Node to a Replaced Node:
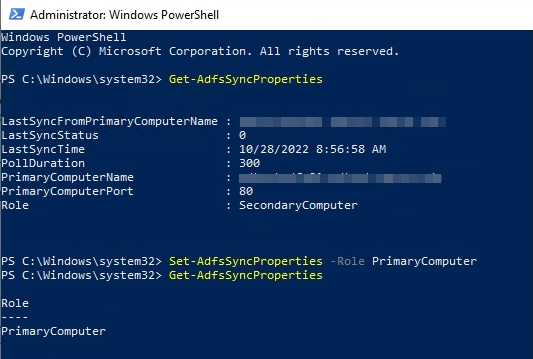
Pick a node that has already been replaced that you want to migrate the primary node to. On this node run the following:
Set-AdfsSyncProperties -Role PrimaryComputer
If you perform a Get-AdfsSyncProperties both before and after you should see the role change.
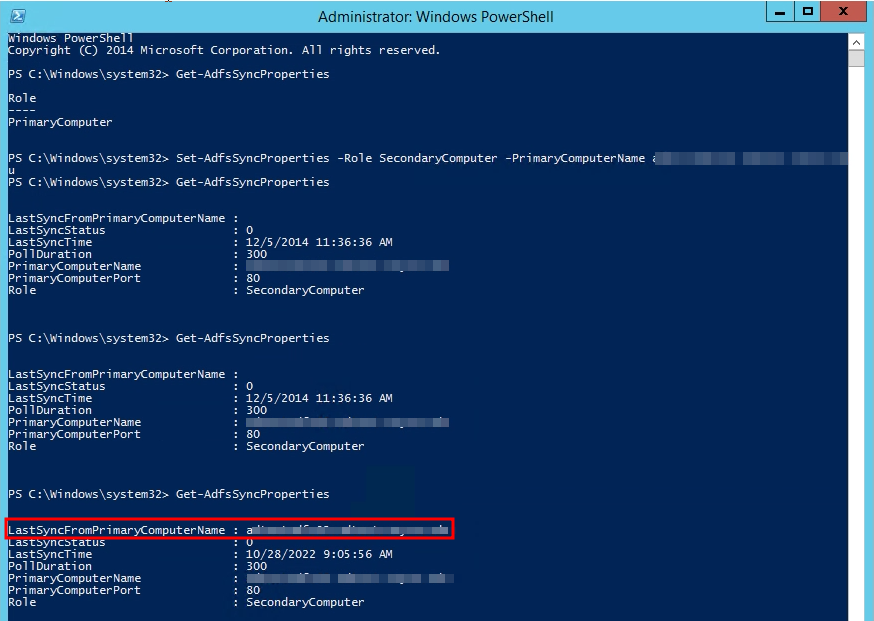
Now you need to go the original primary node owner and run the following:
You will want to wait about 5 minutes and make sure when you run Get-AdfsSyncProperties that you are actually seeing a successful last sync come from the new primary node before you take down the original primary node.
You can now repeat the process listed here to replace the original primary node. If you want to migrate the primary node back when you are done you can follow these instructions again.
There are many security risks with running Active Directory. In the Year 2022, one of these is still running your Active Directory with unsigned/simple ldap binds.
If you don’t already have a PKI environment setup you should probably work to set one up so you can get certificates on your Domain Controllers that are trusted by your businesses devices so unsigned/simple binds can be retired.
A script I’ve found very helpful for monitoring the Domain Controller firewall logs for these events is located here: