This blog is not going to go through the details get the initial ADFS setup. I’m using ADFS on Server 2019 for this demo though. Bring up a Windows Server 2019 and install the ADFS role. This will require a valid SSL certificate. I did not bring up a web proxy as this ADFS server’s only function is to serve authentication for vCenter so we can put DUO behind ADFS.
Add ADFS Certificate(s) Chain to vCenter:
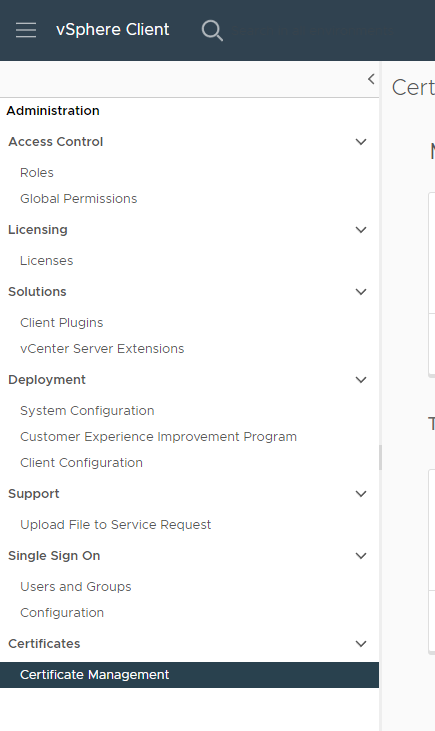
Add the Root & Intermediate CA certificates to vcenter. This can be done under Administration in vCenter at the bottom under Certificates click “Certificate Management”.
Then next to Trusted Root Certificates, click Add and Add Root and/or Intermediate CA certificates here. I added just regular .CRT files that you could open with notepad and show the certificate text.

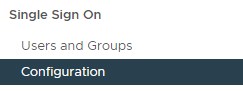
While here in vCenter Administration, navigate to Single Sign On -> Configuration
Over on the right hand side click on the “i” next to “Change Identity Provider”
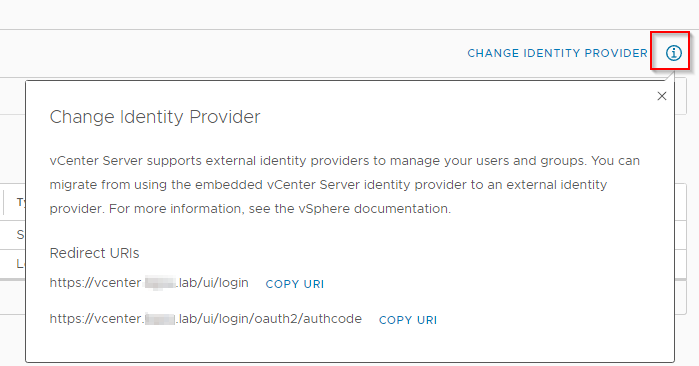
Make note of these Redirect URIs you will need them when you configure ADFS.
Configure ADFS for vCenter:
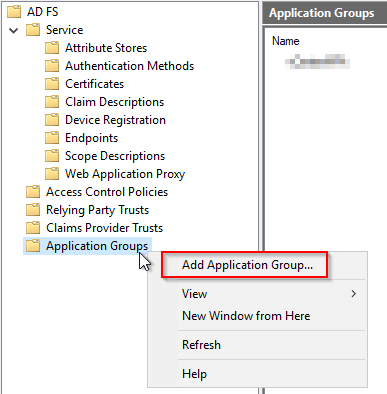
You should now have a brand new install of ADFS with the most basic things configured to make it happy including your SSL certificate. Launch the ADFS Management tool and right click “Application Groups” and click “Add Application Group”.
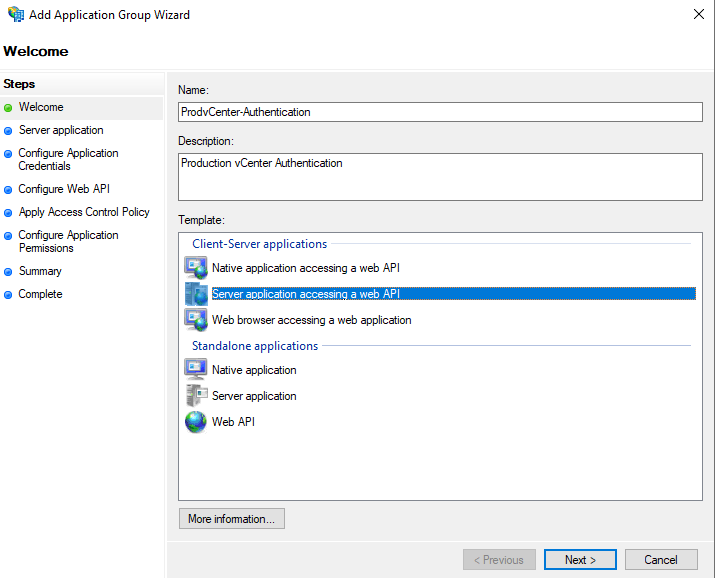
In the wizard that appears, give your Application a Name and Description that means something to you and select “Server application accessing a web API” and click “Next”.
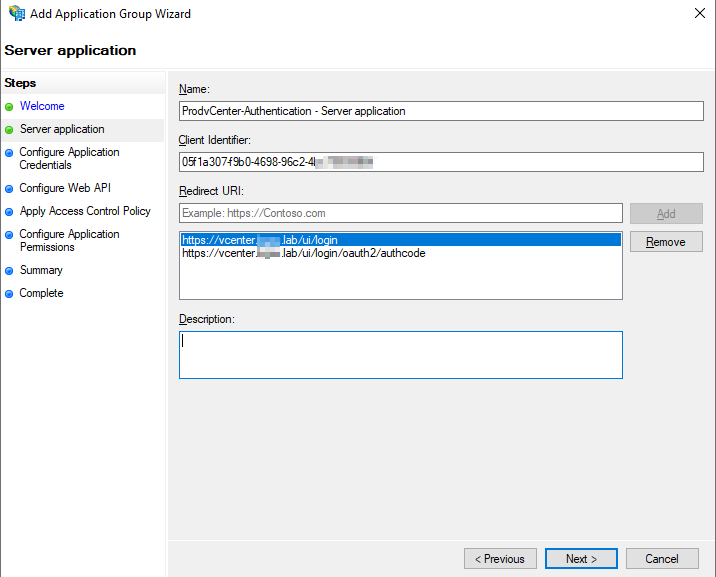
Make note of the Client Identifier. This will be needed later in vCenter configuration. Also input the two redirect URLs you noted earlier in vCenter. Click “Next”.
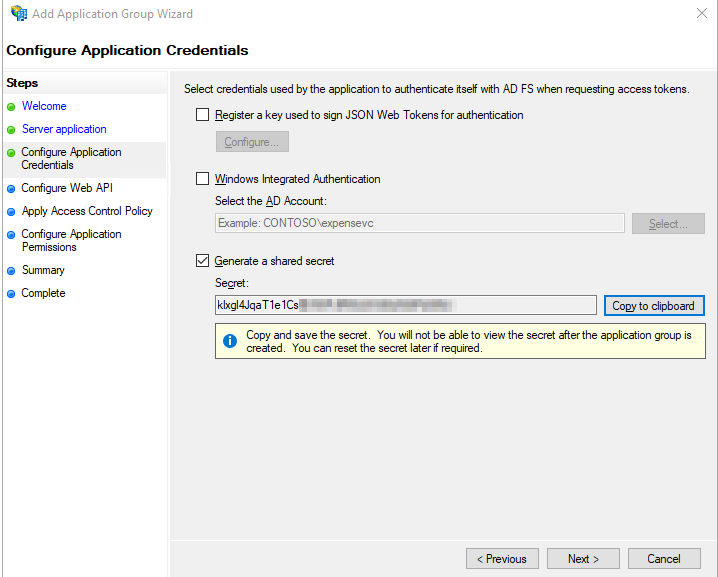
Check the box to Generate a shared secret and copy this down as it will be needed later in vCenter configuration. Click “Next”.
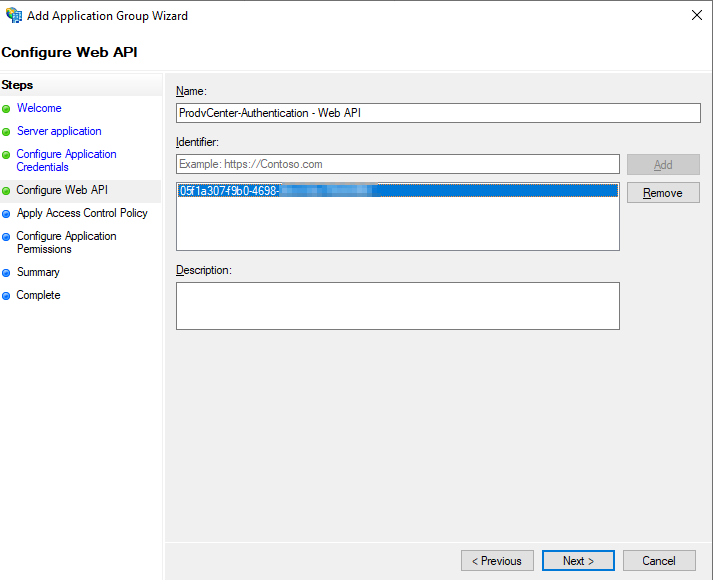
Input the Client Identifier from earlier in this wizard in the Identifier box and click “Add” and then Click “Next”.
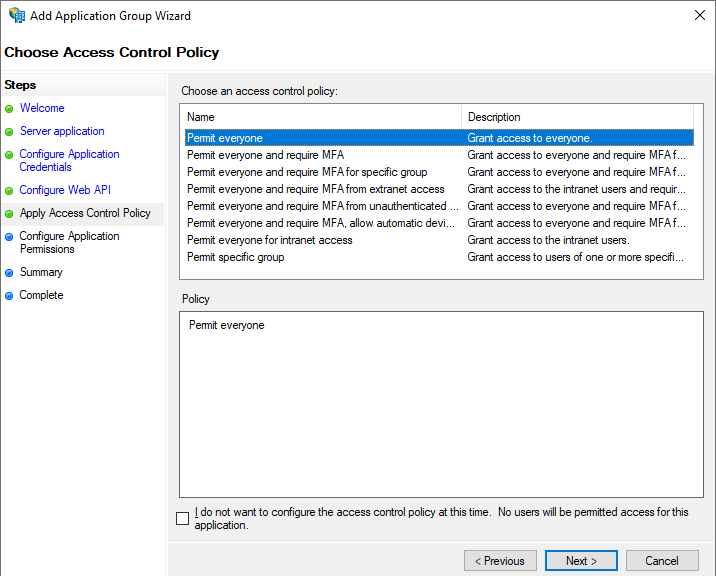
On the next screen for now click “Permit everyone” we can revisit this later after everything is setup. Click “Next”.
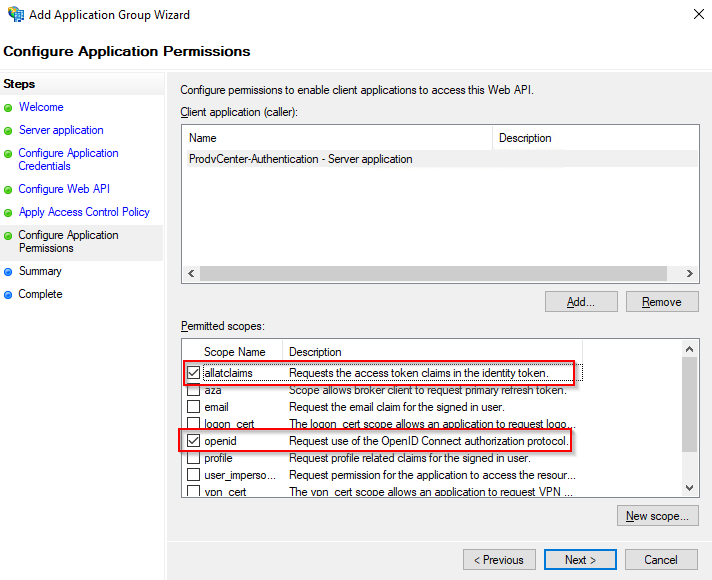
On the next screen make sure “openid” and “allatclaims” are both checked, you will probably have to check “allatclaims”. Click “Next”.
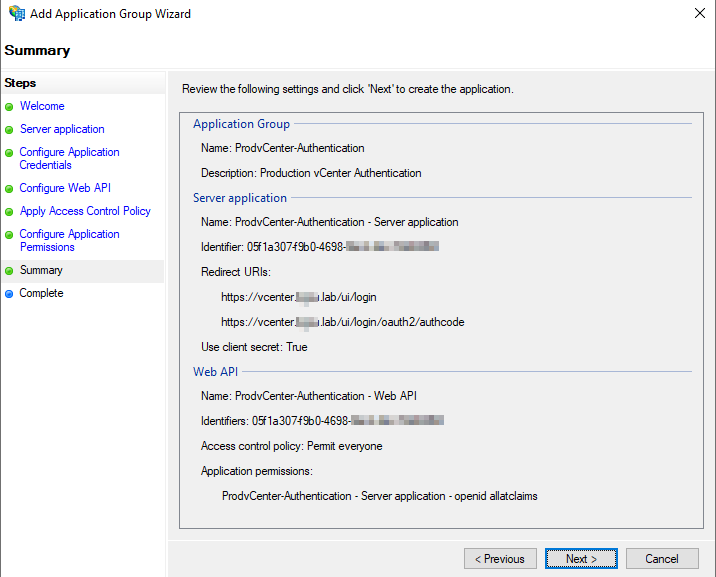
Review and make sure everything looks good. Your Server Application Identifier, and Web API Identifiers should be the same GUID. Click “Next”, and “Close”.
We now need to configure the claims before we can attempt to configure vCenter and attempt a login.
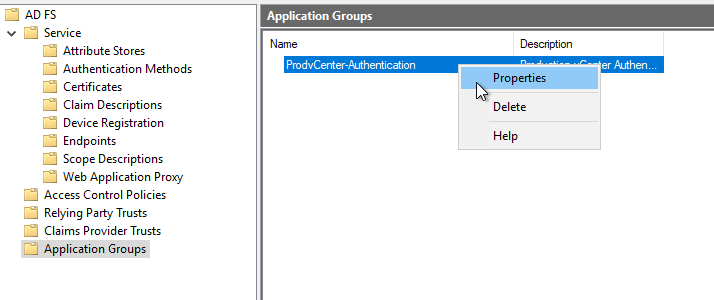
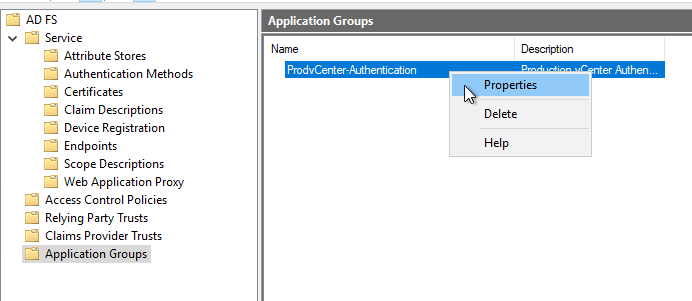
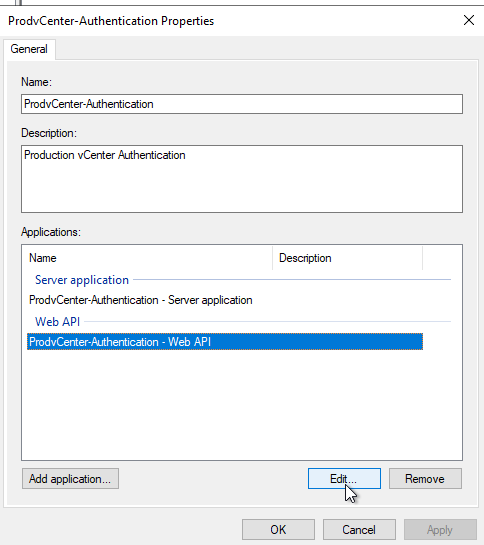
Right-Click the newly created Application Group and select “Properties”
Select the item under Web API and click “Edit”

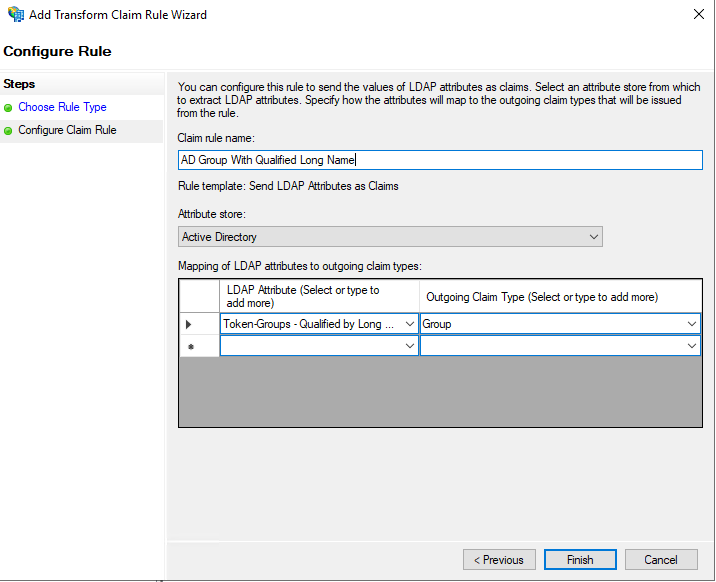
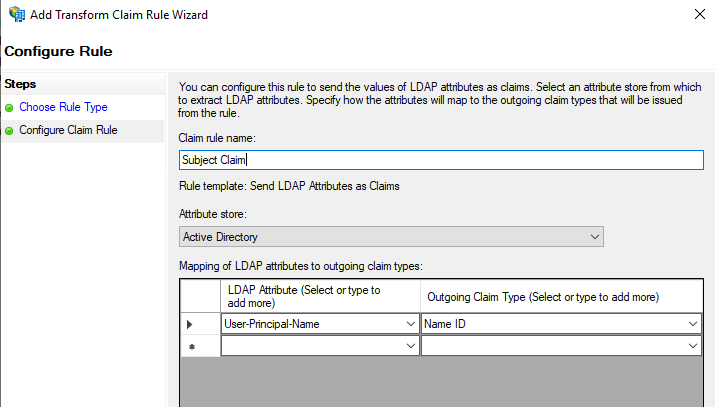
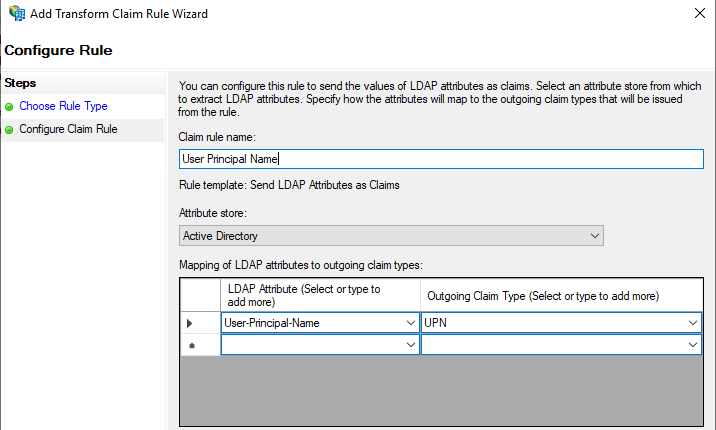
Click on Issuance Transform Rules. Here we will create three rules. Click Add Rule three times and make your rules look like the following:
(Note: All Rules will use the default “Send LDAP Attributes as Claims”)
Group Rule:
LDAP Attribute: Token-Groups Qualified by Long Domain Name
Outgoing Claim Type: Group
Subject Rule:
LDAP Attribute: User-Principal-Name
Outgoing Claim Type: Name ID
UPN Rule:
LDAP Attribute: User-Principal-Name
Outgoing Claim Type: UPN
Click “OK” to close the dialog box after all three rules have been configured. Click “OK” again to close the Authentication Properties box.
Before we switch over to vCenter configuration we need to snag one more thing from our ADFS server, it is our OpenID Address. To obtain this launch a PowerShell window as Administrator on your ADFS server and type in the following:
Get-AdfsEndpoint | Select FullUrl | Select-String openid-configuration
You should receive something like the following (save this URL you will need it for vCenter configuration):

vCenter ADFS Configuration:
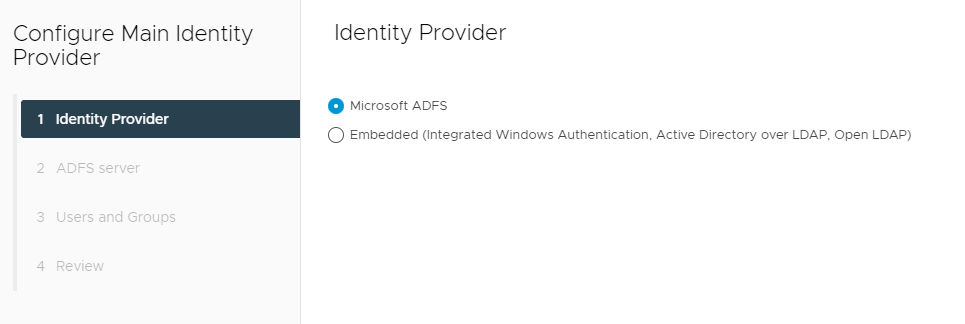
We are now ready to setup the Identity Provider in vCenter. Navigate back to Administration -> Single Sign On -> Configuration.
This time click the “Change Identity Provider” link instead of the “i” next to it.
Click “Microsoft ADFS” and click “Next”.
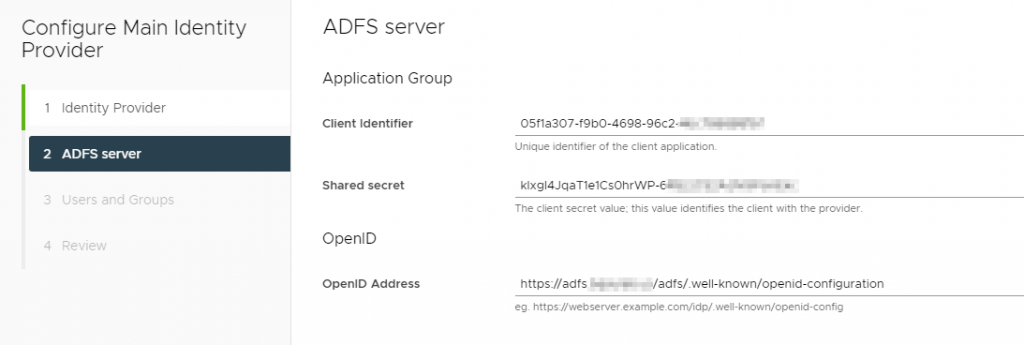
On the next screen, you want to copy the Client Identifier and Shared Secret from ADFS that you set aside during setup. The OpenID address also that we just snagged from ADFS.
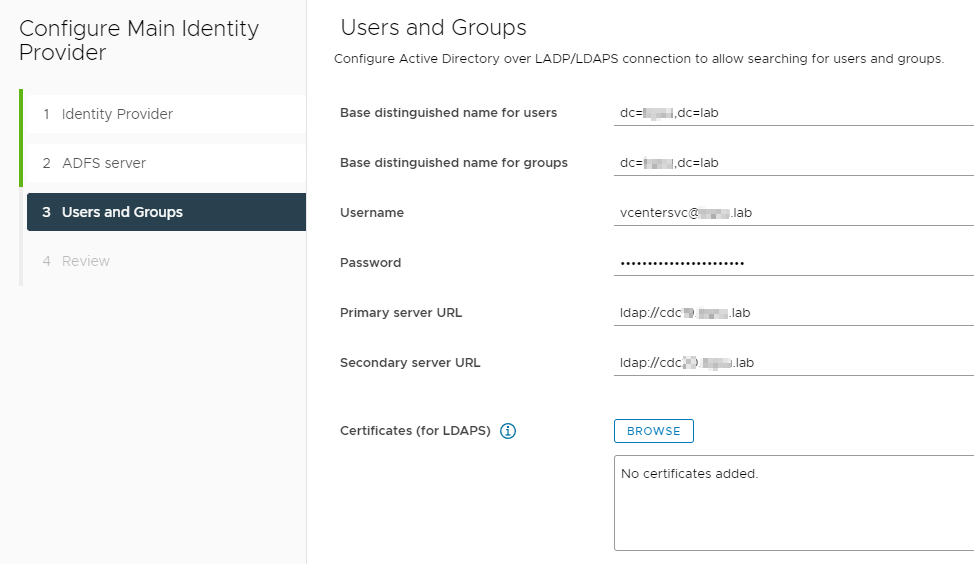
On the next page fill out the base DN for Users and Groups, I’m using the root because this is just a lab setup. I’m using a service account (only requires read access to AD), and I’m only using ldap:// again because this is a home lab. If you are setting this up in Production make sure you are using ldaps://.
Click “Next”, review and click “Finish”.
You should now be able to add an Admin group in vCenter from your Active Directory source. At this point you should be able to logout and log back in to test out authentication to ADFS.
———–YOU SHOULD NOW HAVE vCENTER & ADFS SETUP————
Proceed forward for the DUO configuration and setup.
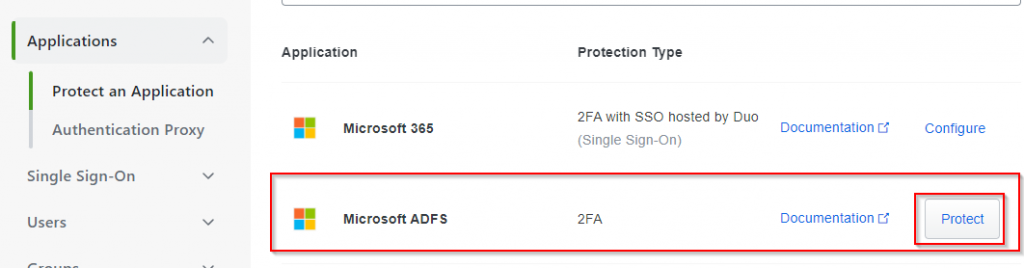
Login to your DUO Administration Portal and Click “Applications” and then “Protect and Application” and then locate the entry for “Microsoft ADFS” and click “Protect”
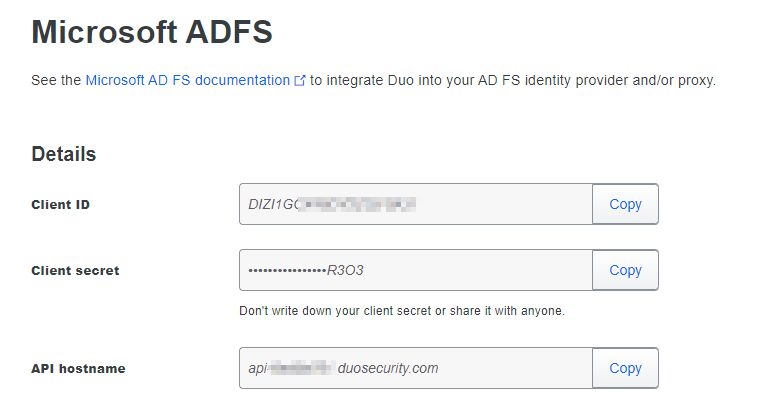
Take note of your “Client ID”, “Client Secret” and “API Hostname”. You will need this information to complete setup on your ADFS server.
Download the DUO ADFS Installer Package for ADFS 2016 or later. (https://dl.duosecurity.com/duo-adfs3-latest.msi)
Run the DUO Installer:
If you have an AD FS farm install Duo on the Primary Server first, if you have a SQL farm you may begin with any node. Since this is just a lab I only have the one server.
Launch the Installer. Click “Next”

Enter the Information from the DUO Admin page, or what your Information Security Team will need to provide to you.
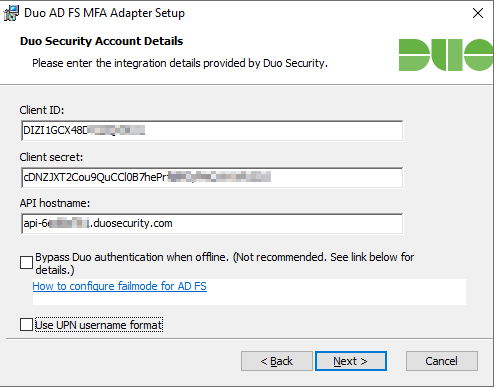
Bypass Duo authentication when offline (unchecked) will make sure it “fails closed” and nobody will be able to access resources if Duo is down. This can be changed later in the registry.
By default DUO sends the sAMAccountName, if you want UPN sent, check the box that says “Use UPN username format”.
Click “Next” and Click “Install”
You may then be prompted by DUO to enable the DUO MFA Authentication.
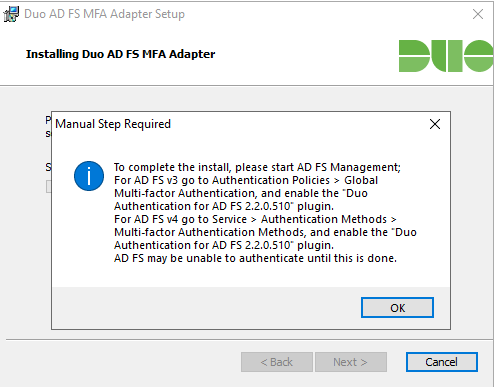
To do this in ADFS Management Open up Service -> Right-Click “Authentication Methods” and click “Edit Multi-factor Authentication Methods”.
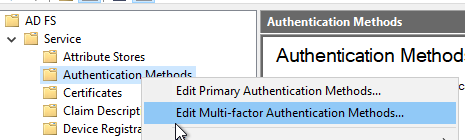
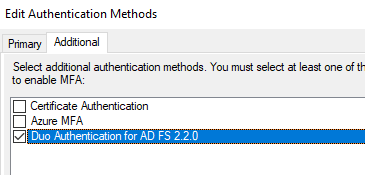
Check the box for Duo and click “OK”
At this point you should still be able to login to ADFS and MFA will NOT be working.
Configure ADFS for MFA:
Go back to your Application Groups, and Right-Click your Application Group and click “Properties”
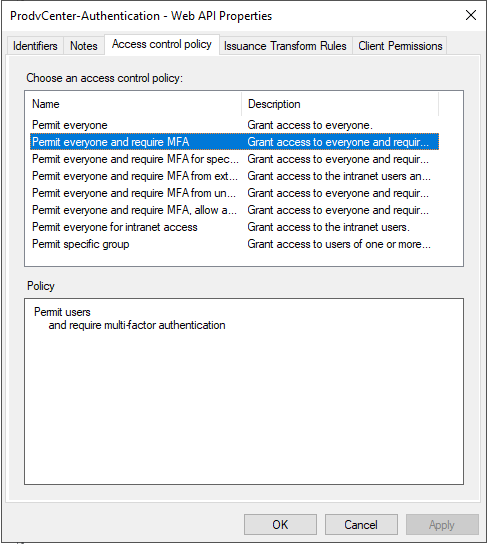
Click Web API and click “Edit”
Go to Access Control Policy and click “Permit Everyone and require MFA”
Test Your Setup and Troubleshoot as needed!