I have recently started playing with Server 2025 Evaluation and trying to configure it in my homelab so it is easy to deploy as I test things out.
However, there was a recent Reddit thread that pointed my attention to supposedly not having any rearms like you did in the previous server versions.
With a fresh install of Server 2025, you are put into the initial grace period with 10 days. After this grace period the product will activate and you will have 180 days (I forced it with slmgr /ato), with 1 rearm left. From my testing I believe you will get 1 full year with the product. (10 days + 180 days + rearm (180 days)).
However, if you deploy Server 2025 and then try to create a VMware Template and deploy from template the customization, you will kill the 1 rearm you have. I think this might be where the disconnect is.
If we go back to 2006 though, and after installing Server 2025 on the VM you want to be your template, you can perform the following tasks so all new deployments will retain the 1 re-arm.
This blog is not going to go through the details get the initial ADFS setup. I’m using ADFS on Server 2019 for this demo though. Bring up a Windows Server 2019 and install the ADFS role. This will require a valid SSL certificate. I did not bring up a web proxy as this ADFS server’s only function is to serve authentication for vCenter so we can put DUO behind ADFS.
Add ADFS Certificate(s) Chain to vCenter:
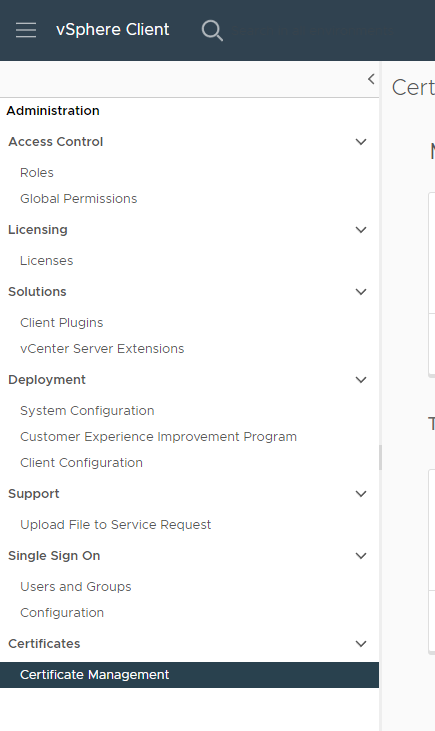
Add the Root & Intermediate CA certificates to vcenter. This can be done under Administration in vCenter at the bottom under Certificates click “Certificate Management”.
Then next to Trusted Root Certificates, click Add and Add Root and/or Intermediate CA certificates here. I added just regular .CRT files that you could open with notepad and show the certificate text.
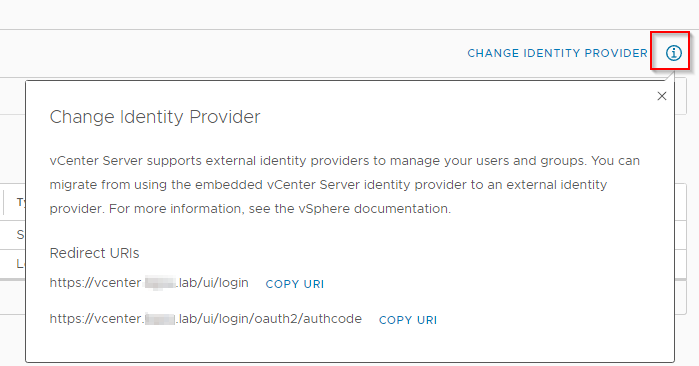
While here in vCenter Administration, navigate to Single Sign On -> Configuration
Over on the right hand side click on the “i” next to “Change Identity Provider”
Make note of these Redirect URIs you will need them when you configure ADFS.
Configure ADFS for vCenter:
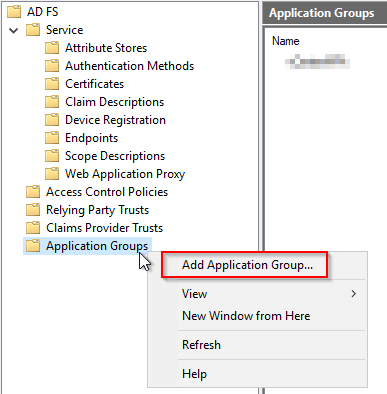
You should now have a brand new install of ADFS with the most basic things configured to make it happy including your SSL certificate. Launch the ADFS Management tool and right click “Application Groups” and click “Add Application Group”.
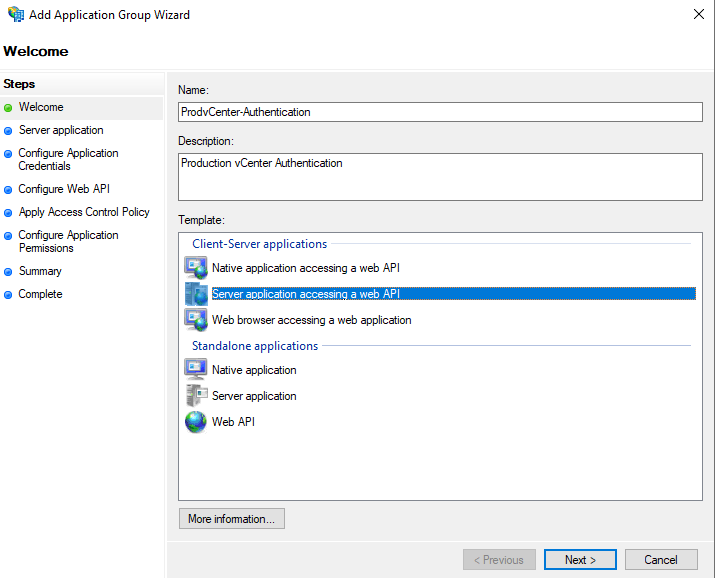
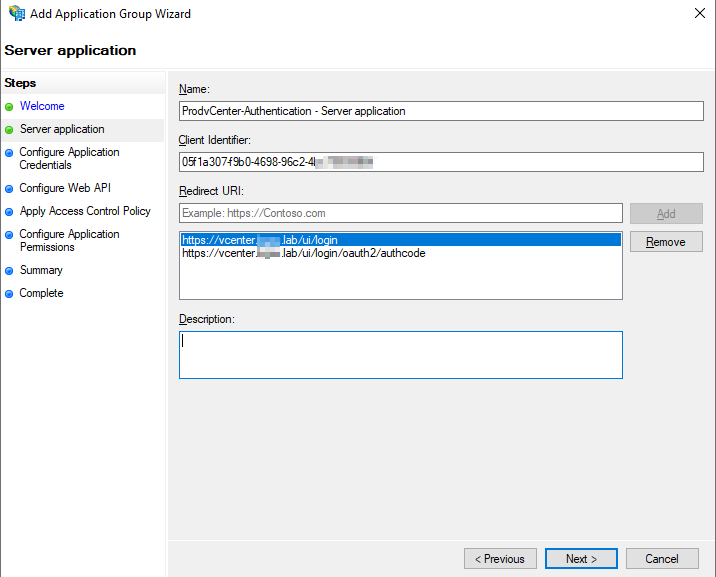
In the wizard that appears, give your Application a Name and Description that means something to you and select “Server application accessing a web API” and click “Next”.
Make note of the Client Identifier. This will be needed later in vCenter configuration. Also input the two redirect URLs you noted earlier in vCenter. Click “Next”.
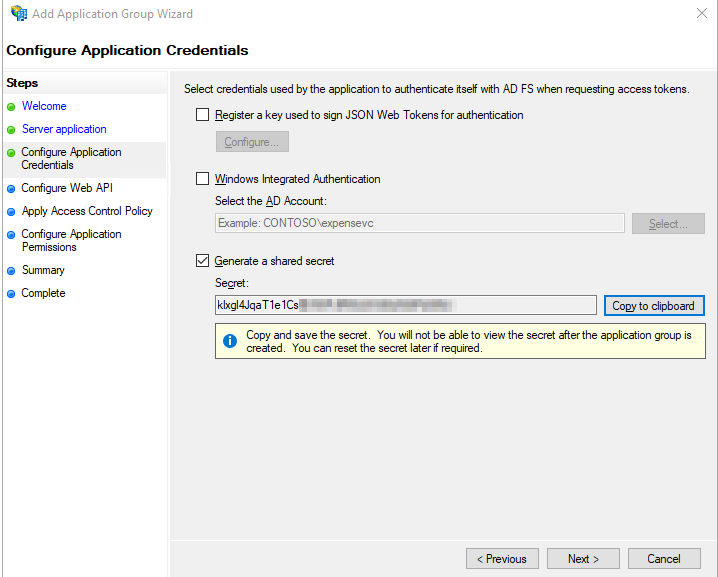
Check the box to Generate a shared secret and copy this down as it will be needed later in vCenter configuration. Click “Next”.
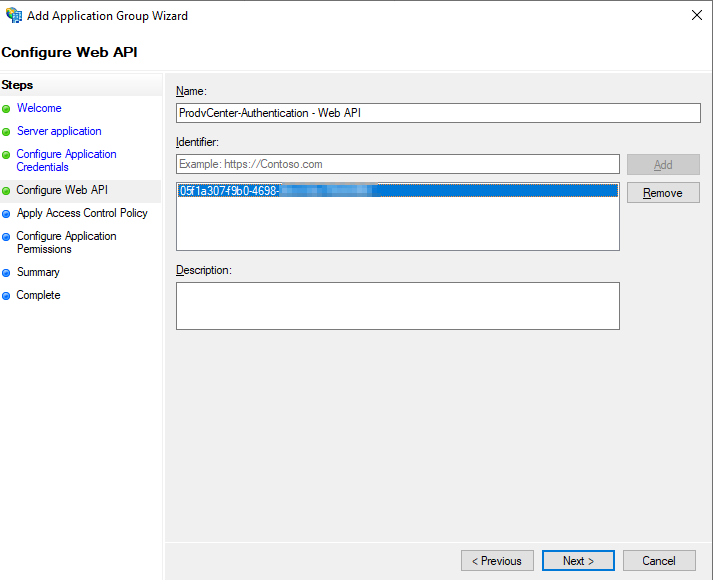
Input the Client Identifier from earlier in this wizard in the Identifier box and click “Add” and then Click “Next”.
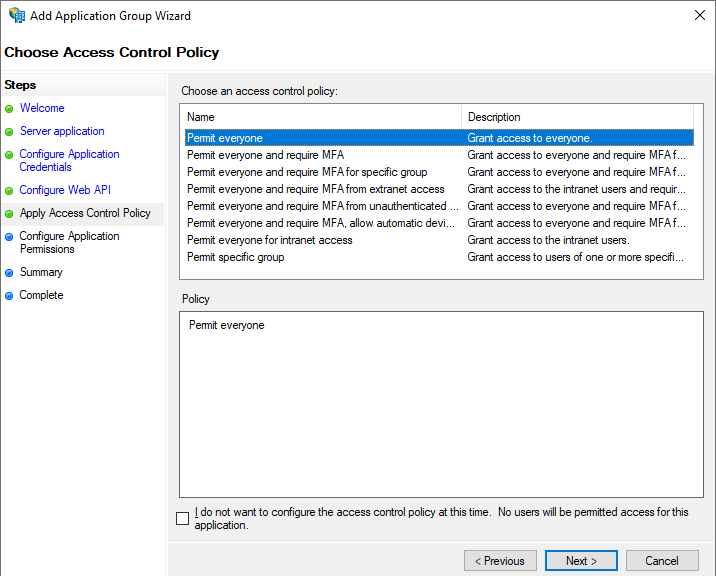
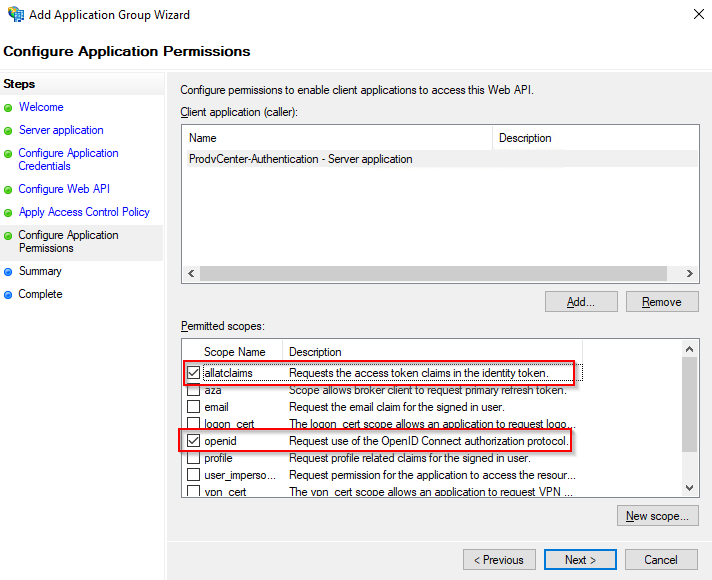
On the next screen for now click “Permit everyone” we can revisit this later after everything is setup. Click “Next”.
On the next screen make sure “openid” and “allatclaims” are both checked, you will probably have to check “allatclaims”. Click “Next”.
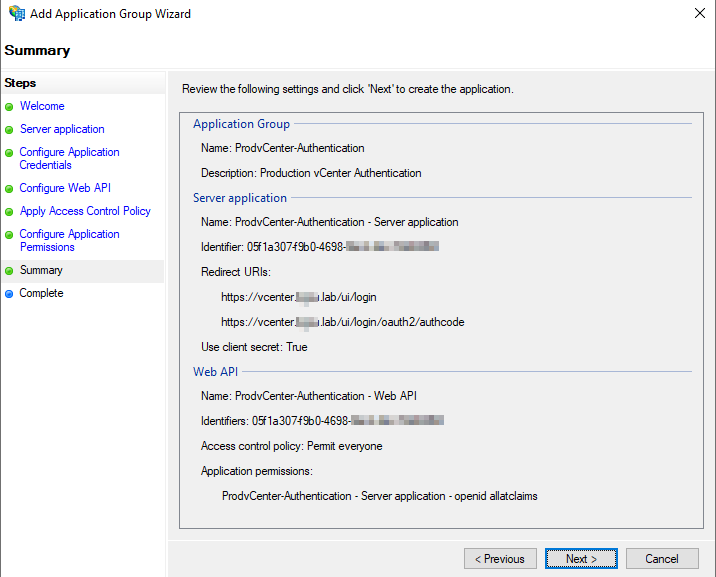
Review and make sure everything looks good. Your Server Application Identifier, and Web API Identifiers should be the same GUID. Click “Next”, and “Close”.
We now need to configure the claims before we can attempt to configure vCenter and attempt a login.
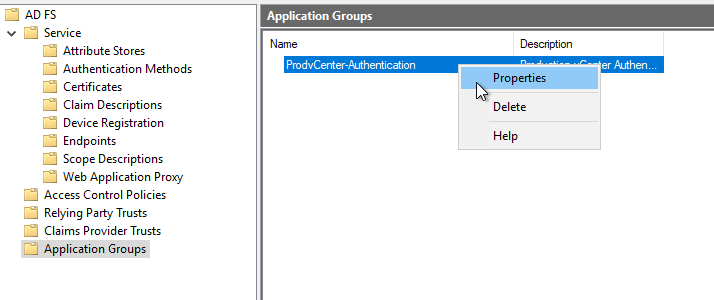
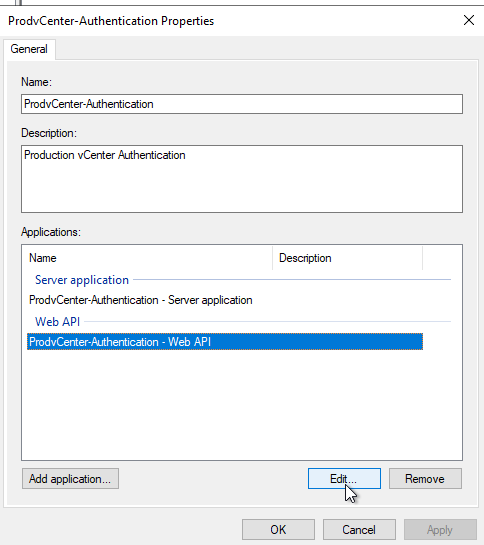
Right-Click the newly created Application Group and select “Properties”
Select the item under Web API and click “Edit”
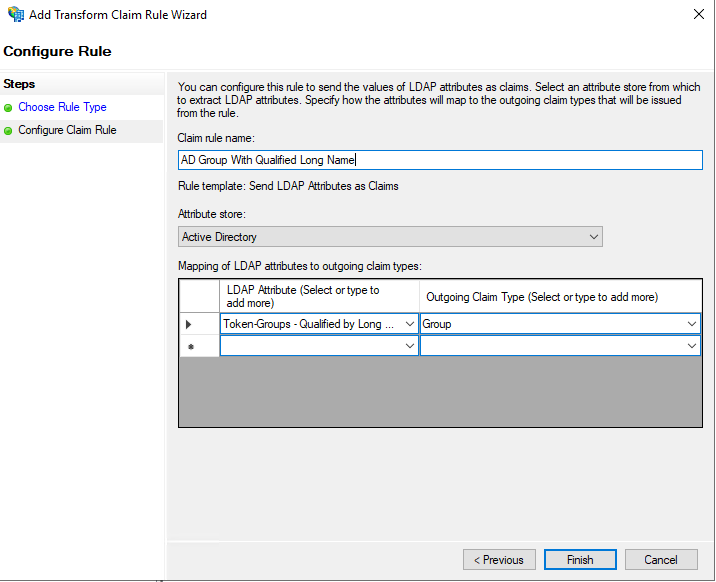
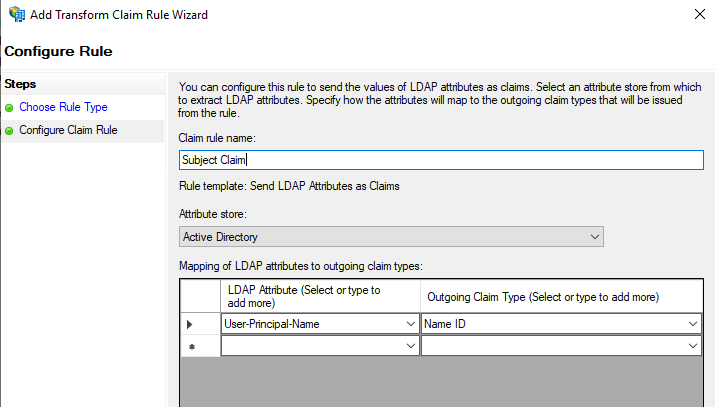
Click on Issuance Transform Rules. Here we will create three rules. Click Add Rule three times and make your rules look like the following: (Note: All Rules will use the default “Send LDAP Attributes as Claims”)
Group Rule:
LDAP Attribute: Token-Groups Qualified by Long Domain Name
Outgoing Claim Type: Group
Subject Rule:
LDAP Attribute: User-Principal-Name
Outgoing Claim Type: Name ID
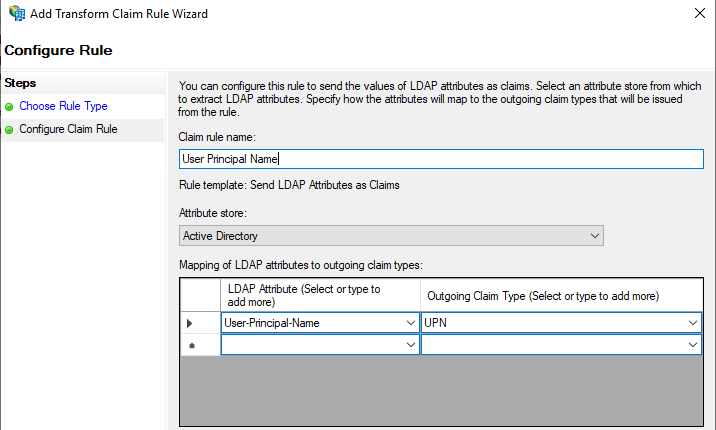
UPN Rule:
LDAP Attribute: User-Principal-Name
Outgoing Claim Type: UPN
Click “OK” to close the dialog box after all three rules have been configured. Click “OK” again to close the Authentication Properties box.
Before we switch over to vCenter configuration we need to snag one more thing from our ADFS server, it is our OpenID Address. To obtain this launch a PowerShell window as Administrator on your ADFS server and type in the following:
You should receive something like the following (save this URL you will need it for vCenter configuration):
vCenter ADFS Configuration:
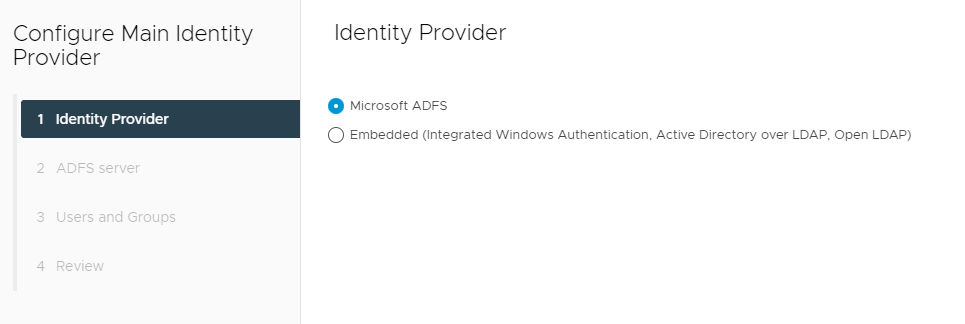
We are now ready to setup the Identity Provider in vCenter. Navigate back to Administration -> Single Sign On -> Configuration.
This time click the “Change Identity Provider” link instead of the “i” next to it.
Click “Microsoft ADFS” and click “Next”.
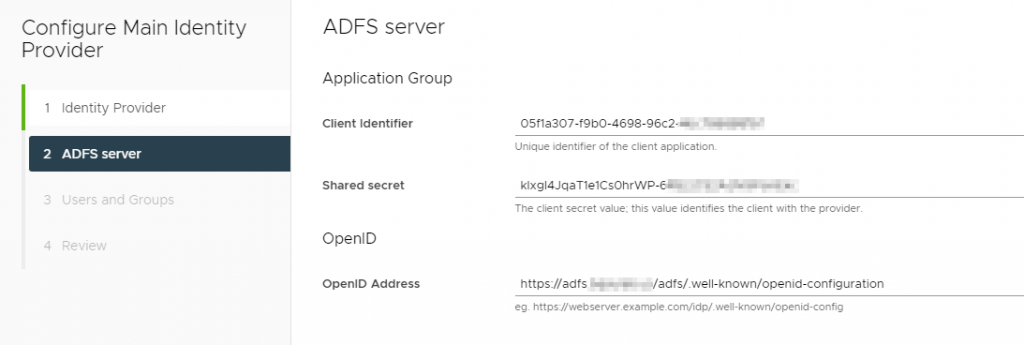
On the next screen, you want to copy the Client Identifier and Shared Secret from ADFS that you set aside during setup. The OpenID address also that we just snagged from ADFS.
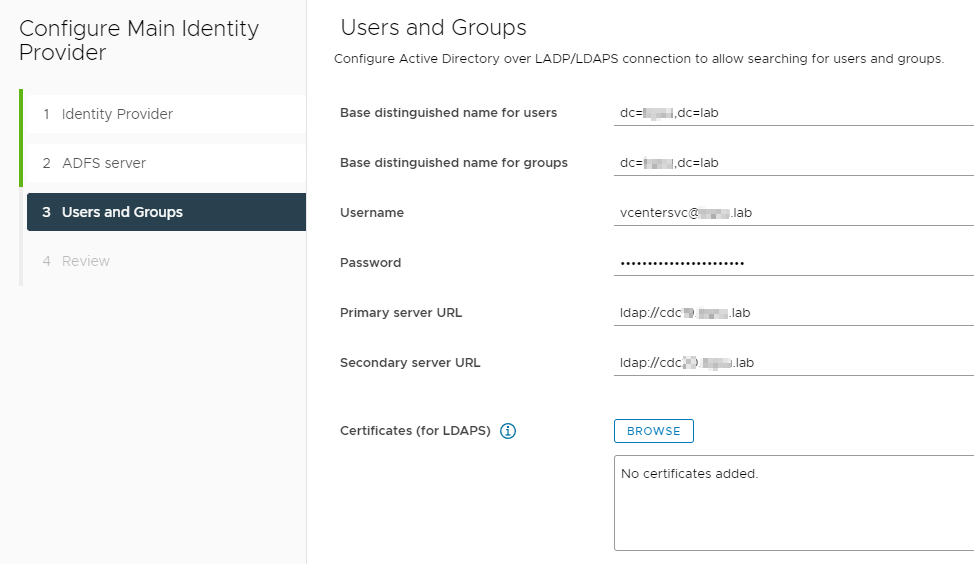
On the next page fill out the base DN for Users and Groups, I’m using the root because this is just a lab setup. I’m using a service account (only requires read access to AD), and I’m only using ldap:// again because this is a home lab. If you are setting this up in Production make sure you are using ldaps://.
Click “Next”, review and click “Finish”.
You should now be able to add an Admin group in vCenter from your Active Directory source. At this point you should be able to logout and log back in to test out authentication to ADFS.
———–YOU SHOULD NOW HAVE vCENTER & ADFS SETUP————
Proceed forward for the DUO configuration and setup.
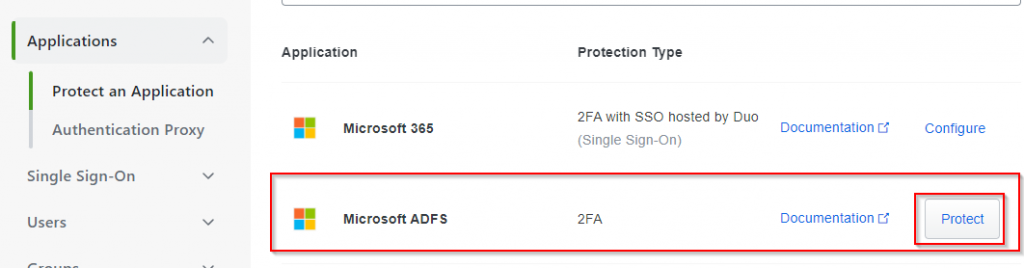
Login to your DUO Administration Portal and Click “Applications” and then “Protect and Application” and then locate the entry for “Microsoft ADFS” and click “Protect”
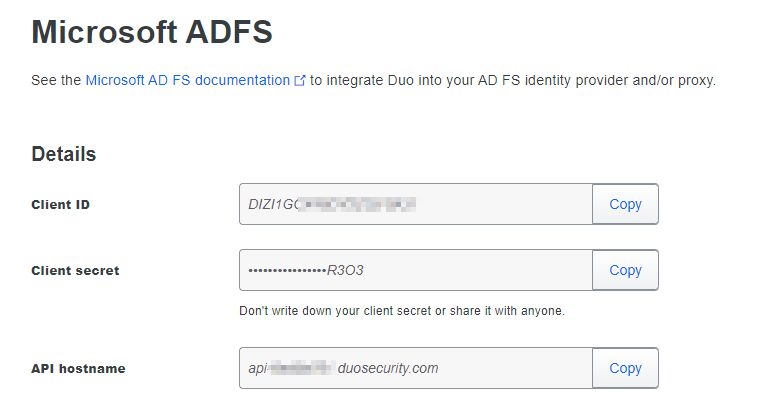
Take note of your “Client ID”, “Client Secret” and “API Hostname”. You will need this information to complete setup on your ADFS server.
If you have an AD FS farm install Duo on the Primary Server first, if you have a SQL farm you may begin with any node. Since this is just a lab I only have the one server.
Launch the Installer. Click “Next”
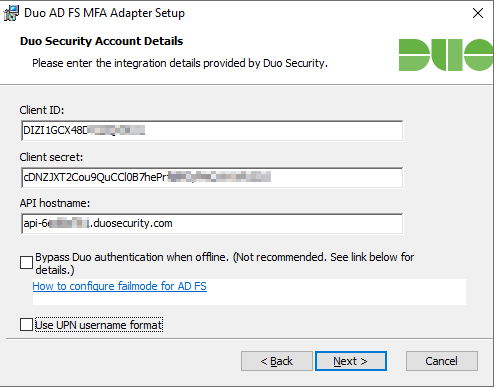
Enter the Information from the DUO Admin page, or what your Information Security Team will need to provide to you.
Bypass Duo authentication when offline (unchecked) will make sure it “fails closed” and nobody will be able to access resources if Duo is down. This can be changed later in the registry.
By default DUO sends the sAMAccountName, if you want UPN sent, check the box that says “Use UPN username format”.
Click “Next” and Click “Install”
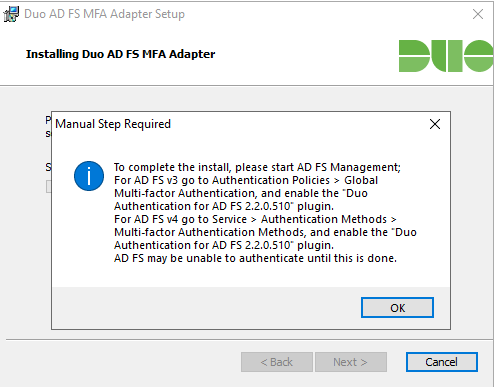
You may then be prompted by DUO to enable the DUO MFA Authentication.
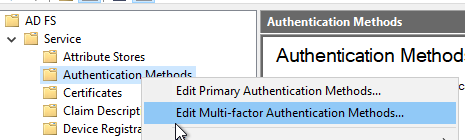
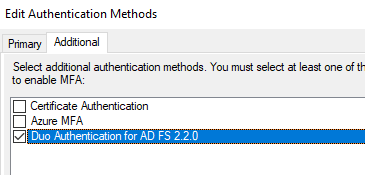
To do this in ADFS Management Open up Service -> Right-Click “Authentication Methods” and click “Edit Multi-factor Authentication Methods”.
Check the box for Duo and click “OK”
At this point you should still be able to login to ADFS and MFA will NOT be working.
Configure ADFS for MFA:
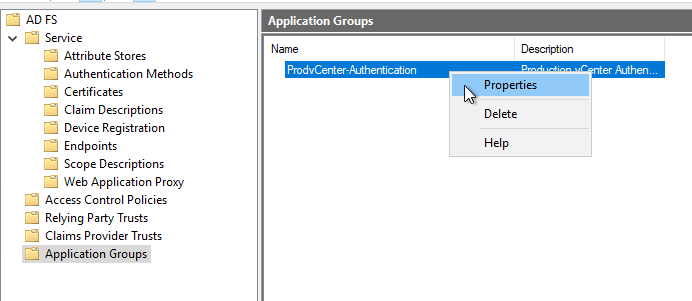
Go back to your Application Groups, and Right-Click your Application Group and click “Properties”
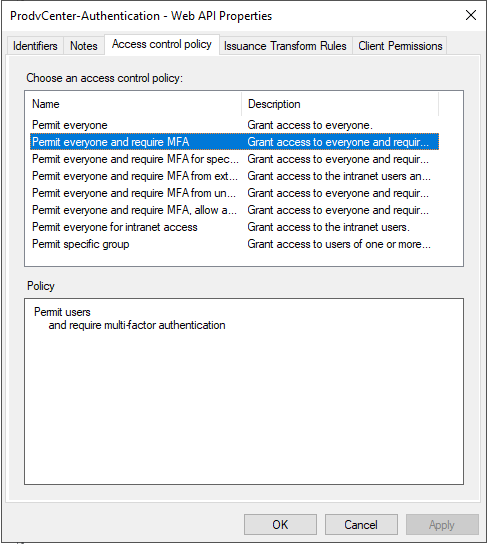
Click Web API and click “Edit”
Go to Access Control Policy and click “Permit Everyone and require MFA”
Reboot the virtual appliance, and immediately after the OS starts, press e to open the GNU GRUB Edit Menu.
Locate the line that begins with the word linux.
Option 1
At the end of the line, add fsck.repair=yes then reboot the appliance. This will force the default filesystem check to auto-resolve any issues, and does not require emergency mode.
We ran into an issue with Macs connecting to our file services while attempting an upgrade on a Microsoft Clustering Services File Services on Server 2012R2.
Current Environment:
Two 2012R2 Servers/Two 2016 Servers, with the following Roles/Features Installed:
ROLES – File and Storage Services:
File Server
DFS Namespaces
DFS Replication
File Server Resource Manager
FEATURES
Failover Clustering
Testing:
Two Virtual Machines running 2012R2, with Microsoft Clustering Services, with multiple File Server Roles. Everything works with the Macs connecting to these Clustered File Services while running 2012R2. The cluster level is also 2012R2.
However, after adding a 2016 Server into this Microsoft Cluster, and failing over one of the file server roles to it, the Macs can no longer connect to that file server. They receive a message stating:
There was a problem connecting to the server “”. Check the server name or IP address, and then try again. If you continue to have problems, contact your system administrator.
If you migrate the file server role back to a server running 2012R2 the Mac can once again connect.
Resolution:
I plan to come back to this blog to post a more detailed writeup. I was passed on a lot of information that I haven’t seen but I will try to best to explain what I believe is happening.
When a 2016 Server is added to a 2012R2 only cluster, the cluster moves into “Mixed Mode” to allow both Operating Systems to function. Now Microsoft states you should not stay in this mode very long, from what I’ve seen thrown around no more than 4 weeks.
This is hearsay from packet captures but when a Mac tries to connect to the File Services running on 2016 Server while in mixed mode it supposedly connects on SMB 3.1.1, but then something in the network stack wants to downgrade the connection to SMB 2.0, and the Macs cannot follow it and therefore cannot connect to the server.
However, after removing the 2012R2 servers, and then upgrading the Cluster Level to 2016, the Macs can then connect again.
I’m still doing some troubleshooting and this post will be updated.
First, don’t go running down the street with your hands in the air as Mandiant has not uncovered any vulnerabilities that were exploited to gain access to ESXi. Threat actors would still need the proper rights (root) on ESXi to install backdoor VIBs. However, since many people use central authentication systems like Active Directory though, it may be easier for threat actors to pivot into your environment if Active Directory is compromised.
The CISA link above provides all of VMware’s important links to make sure you are secured as possible. I’d highly recommend reading through all of the material here that VMware has put out.
The best thing you can do is setup Defense in Depth.
**EDIT** If you log into vcenter with an Active Directory account you should be able to modify an already existing Identity Source. I had been logging in with local administrator account.
For reference we already had our linked vCenter talking to Active Directory over LDAPS. However, we are currently in the process of migrating all of our VMs over to new hardware. When we tried to move the main Active Directory server providing authentication to vCenter, lets just say it was not happy.
Upon trying to enter into the Identity Sources and update the server(s) manually on the Identity Source that was already being used we received the following message: “Check the network settings and make sure you have network access to the identity source”.
It was not found until after doing some Googling that you have to remove your current running Identity Source in order to make changes. In other words delete the current identity source and add a “new” one in order to make the changes you want to make.
This just seems bad.
However, after doing a lot of testing in our TEST environment I could not seem to run into any snags. If you login with [email protected] and delete and then immediately re-add the identity source back with the same domain name, alias, etc, there does not seem to be any issues. All of your permissions on objects defined with AD groups will remain.
I used the method listed in this VMware KB for grabbing the certificates I needed for both the Primary and Secondary Active Directory Servers. (https://kb.vmware.com/s/article/2041378).
I’m personally not a fan of in place Microsoft Server upgrades but I suppose they have their time and place.
Since many of our 2012R2 servers are from the 5.1 and 5.5 days of VMware many of them are still running Virtual Hardware v9. This hardware version needs to be upgraded to perform the OS upgrade.
I was able to successfully re-create the issue with an upgrade of a clean 2012R2 install on v9 hardware. After the first reboot you will get stuck at the black screen with blue window, with no circle running underneath. I let this run for two full days (48 hours) before cancelling it.
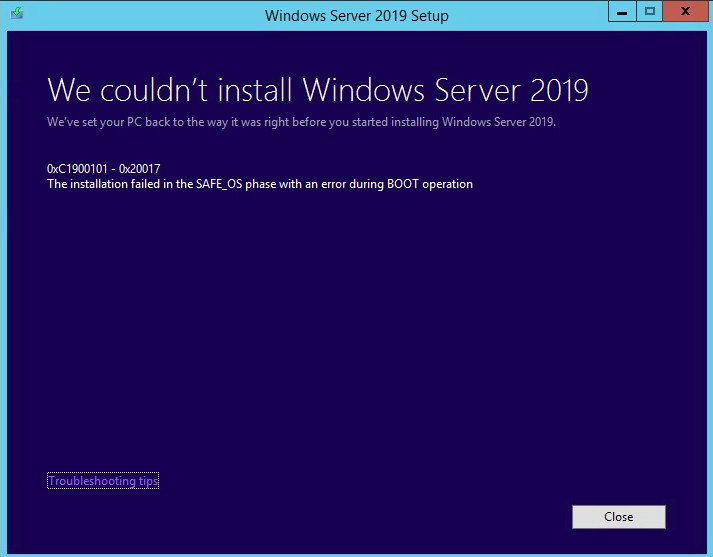
After cancelling it and resetting the VM, you will be given the following error message:
We couldn’t install Windows Server 2019
We’ve set your PC back to the way it was right before you started installing Windows Server 2019.
0xC1900101 – 0x20017
The installation failed in the SAFE_OS phase with an error during BOOT operation
VMware generally states that you shouldn’t upgrade the VM hardware version unless there is a need. In this case there is a need.
My recommendations would be to do the following:
Shut down the VM you want to perform an in place upgrade on
Take a snapshot with the VM off
Upgrade the Virtual Machine hardware version (We went to v15)
Power on the VM, mount the ISO, run the upgrade
This process seems to be working for us, and although this may be a no-brainer, I’m putting it out there for the search engines to index in case it does help someone.
I have been struggling to figure out why Kali Linux would not update after a fresh install on VMware Fusion, virtualized on my Intel Macbook Pro 16″ laptop.
I was either receiving one of these error messages when trying to perform a “sudo apt update” on a fresh install:
The following signatures were invalid: BADSIG ED444FF07D8D0BF6 Kali Linux Repository <[email protected]>
There seems to be an issue within VMware Fusion with the network management, trying to share a WiFi connection. I’ve read on some forums that people have had luck with sharing the connection instead of bridging it. If I try to share the connection I lose internet on my Kali VM.
The only way I can keep a connection is to bridge the connection, which gives me an IP off my wireless and lets me browse the Internet but something is being done to the traffic when trying to update which causes some security issues.
My current work around was to plug in another USB WiFI adapter and pass it through to the VM and let the VM use it to connect to my wireless in order to get out.
This only appears to be an issue when installing or updating software and I’m not quite sure what the network stack is doing underneath. When I have more time I hope to dig into this further..
After rebooting our vCenter appliance we noticed an error on vCenter regarding “Certificate Status”
After going to the Administration snap-in and clicking on “Certificate Management” and logging in to verify certificates we saw nothing out of order. All the VMware provided certificates were fine. I decided to keep digging.
for i in $(/usr/lib/vmware-vmafd/bin/vecs-cli store list); do echo STORE $i; /usr/lib/vmware-vmafd/bin/vecs-cli entry list --store $i --text | egrep "Alias|Not After"; done
This provided the output necessary to see all certificates on the vCenter appliance, including third-party certificates. We noticed that we still had a thirty party certificate listed in vCenter with an expiration date coming up even though we already replaced it.
We are following up with the third-party vendor to get to a resolution.